

Your best take can depend on what you pack before stepping up to the mic. Knowing what to bring to a recording session comes down to four essentials: your instrument and useful accessories, a drive for file backups, lyrics and other session materials, and water with light snacks. A little preparation keeps the focus on your performance, not a missing cable or forgotten chart.
It’s natural to concentrate on the song itself. Familiar gear, clear references, and a few comfort essentials can also help you settle in and work creatively.
This guide covers what to pack, from instrument-specific spares and storage drives to printed lyrics, reference tracks, and refreshments. You’ll also learn how to organize your materials so you can communicate your sound and stay ready for the next take. Bring the essentials, leave the clutter behind, and arrive ready to create.
Key Takeaways
- Pack your instrument and the accessories or spare parts that suit it, so a small equipment issue is less likely to interrupt a take.
- Bring a compatible storage drive and keep a physical copy of your session files for the trip home.
- Use lyrics, reference tracks, and concise notes to communicate the arrangement and sound you’re aiming for.
- Bring water and simple snacks to stay comfortable and focused through the session.
1. Choosing recording gear for instruments and voices
Bring the instrument you know best, whether that’s your guitar, bass, keyboard, or a pair of drumsticks. Familiar gear can help you feel settled and capture a performance that fits your vision. A recording studio’s available equipment varies, so plan to bring personal instruments and accessories you rely on.
Pack instrument-specific supplies alongside your main gear. Guitarists can bring picks in different thicknesses, a strap, capo, tuner, and spare strings; upright bassists should pack their bows. Drummers can bring their preferred sticks and spare parts such as drum heads. For any instrument, include small essentials that could interrupt a take if missing, such as batteries or the right cable.
For guitar and bass, restring 24 to 48 hours before recording so new strings have time to stretch and stabilize. Bring another set anyway. Pack a tuner and metronome, even if the music studio has them, so you can check pitch and tempo with familiar tools. If your amplifier is inconsistent, arrange servicing weeks, not days, before the session.
What equipment and instruments should you bring? Pack your primary instrument, its usual accessories, and practical spares, such as strings, cables, or batteries. Your own gear supports a consistent setup; the studio’s available equipment can vary.
Singers should bring headphones or in-ear monitors they’re comfortable wearing, plus a quarter-inch adapter if needed for the headphone connection. Check compatibility with the studio’s setup before packing them. Bring water, and warm up your voice before recording. Comfortable clothing also helps you move freely at the microphone.
What does a recording studio usually provide, and what should you bring yourself? Equipment availability differs by studio, so bring personal instruments and essential accessories rather than assuming they’ll be on hand. Any rental price depends on the specific gear and studio arrangement, and is given after a quote request; equipment selection and session needs shape the cost.
2. Backing up files on a hard drive or flash drive
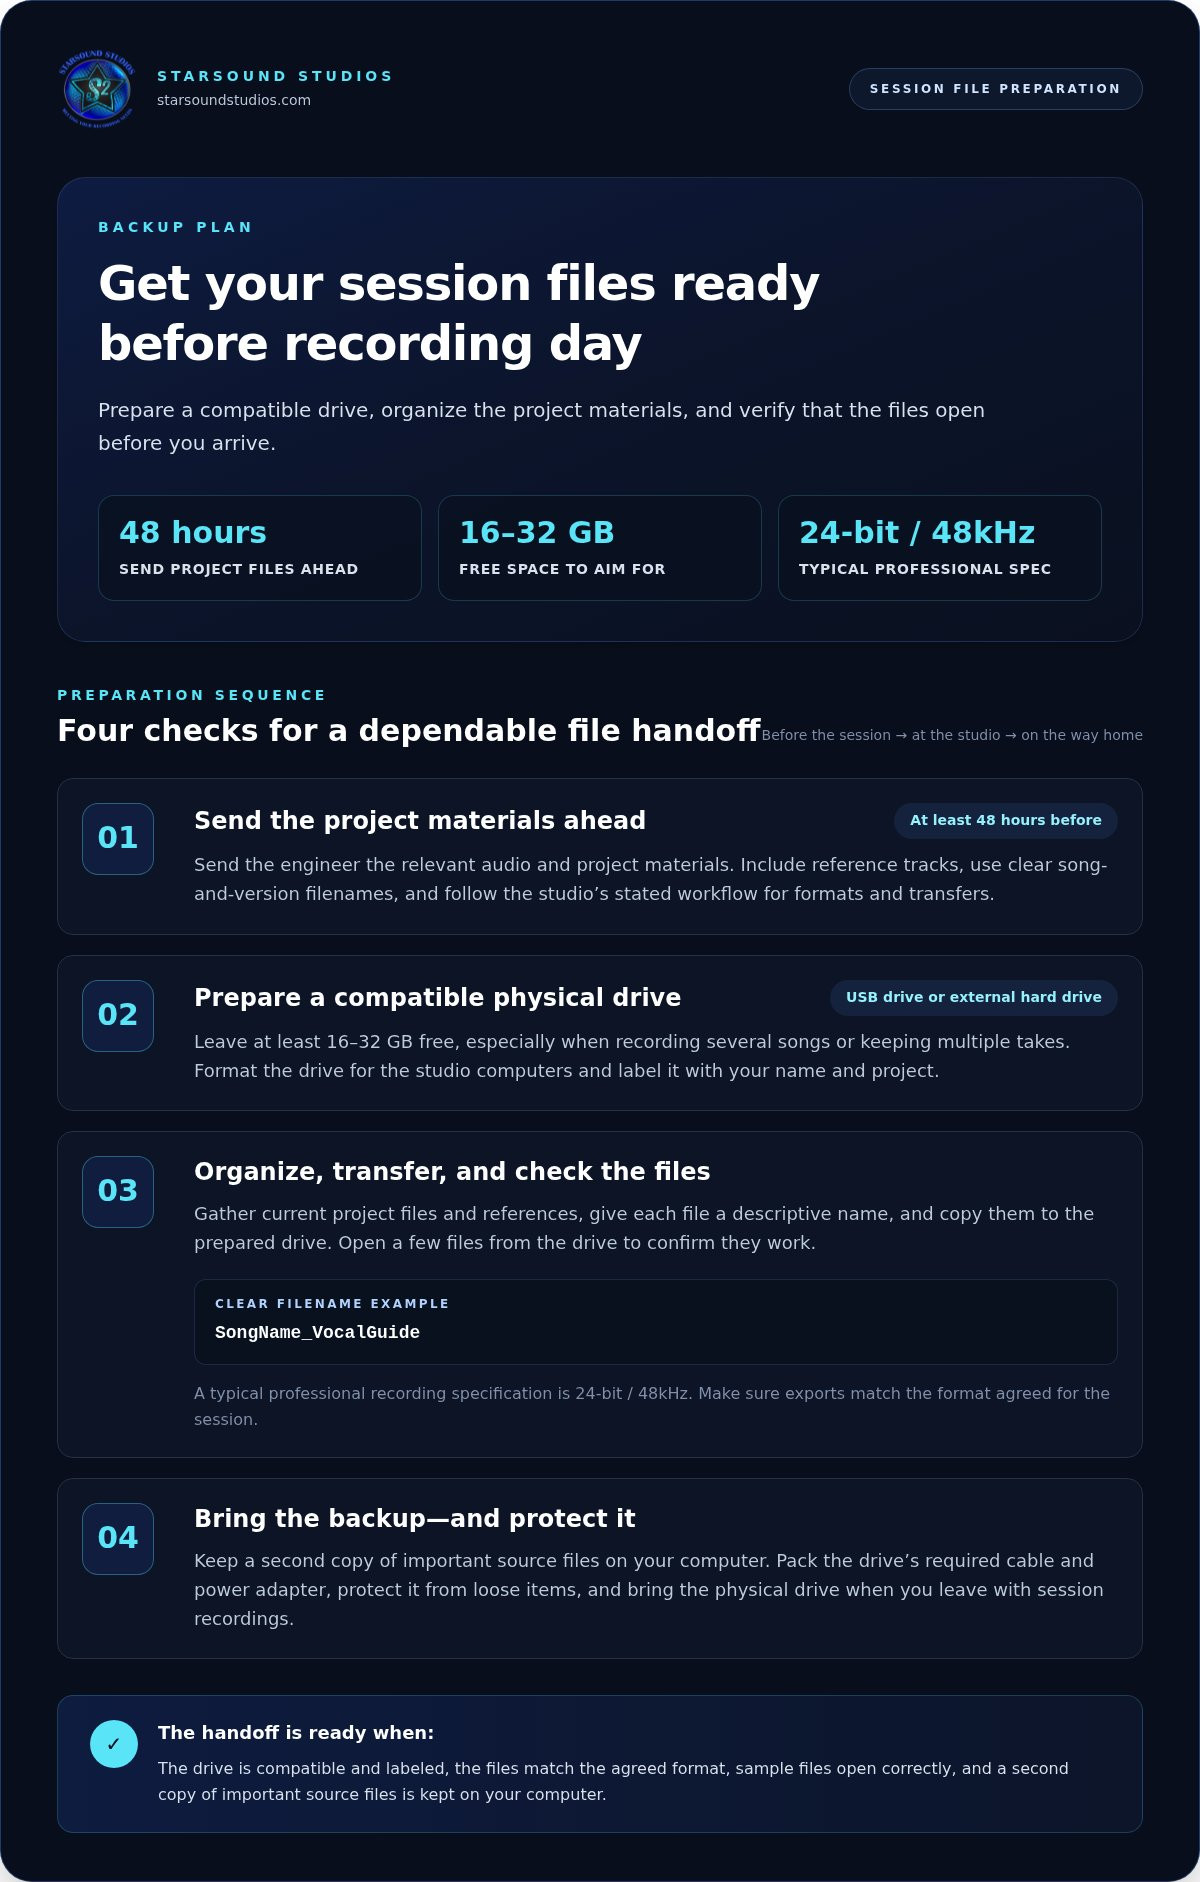
Bring a USB drive or external hard drive for copies of your session files. Aim for at least 16 to 32 GB of free space, especially if you’re recording several songs or keeping multiple takes. A physical backup gives you a copy to take home, rather than relying only on files stored on the studio computer.
Prepare your drive before the studio session. Format it for compatibility with the studio’s computers, and label it clearly with your name and project. If you use a hard drive, pack its required cable and power adapter. Protect the drive in your bag, separate from loose items such as picks or strings.
Project files need preparation, too. Send them to the engineer at least 48 hours before the session. Include the relevant audio and project materials, and use clear filenames that identify the song and version. A typical professional recording specification is 24-bit / 48kHz; make sure your exported files match the agreed session format.
- Gather the current project files and reference tracks.
- Use descriptive filenames, such as “SongName_VocalGuide.”
- Copy the materials to your prepared drive.
- Open a few files from the drive to confirm they work.
These steps help catch missing files or playback problems before recording begins. Keep a second copy of important source files on your computer, and bring the physical drive when you leave with session recordings. Follow the studio’s stated workflow for file formats and transfers.
Studio rules for equipment and file delivery can vary, so follow the instructions for the specific session. Arrive with files prepared and allow time to connect the drive, confirm playback, and resolve basic setup issues before recording. For a focused session in a dedicated creative space, explore professional recording sessions.
3. Lyrics, reference tracks, and session notes
Bring printed lyrics and a chord chart for every song on your set list. Even if you know each line by heart, paper gives you a dependable backup during a long take. Mark the bridge, alternate ending, or harmony entry so musicians can find the right passage quickly. If a song changes key, write the new chord names beside the original.
Reference tracks help you explain the sound you’re aiming for. Choose specific examples and note what matters: vocal tone, drum feel, guitar texture, or overall balance. Tell the engineer, “Use the close vocal sound from this track,” rather than asking for a general match. Save the reference audio on your phone or laptop and have it ready to play without searching through playlists.
Session notes turn creative ideas into clear directions. Prepare a short page for each song with details such as:
- Tempo and arrangement changes, including a half-time chorus.
- Specific effects, such as a wide reverb on the final vocal.
- Sections needing another take, such as verse two or the bridge.
- Performance cues, including a harmony entrance after the first chorus.
Printed lyrics can keep your focus on making music instead of managing a screen. A phone may display notifications or lose its connection, while a paper copy stays visible beside the microphone. Use large, readable text and leave space for handwritten edits. Keep one marked-up copy for your cues and a clean copy for collaborators.
Before the studio session, organize files by song title and label each reference clearly. For example, name an audio file “SongTitle_VocalReference” and identify whether it reflects the mix, mood, or arrangement. Put the notes, charts, and lyric sheets together in one folder. This simple step gives the engineer and other artists a shared map, helping everyone protect the song’s energy and stay focused on the performance.
4. Water and light snacks
Recording can stretch across a long day, so bring water and easy snacks to maintain your energy. A bottle you can close between takes helps keep the work area tidy. Pack ready-to-eat food, such as a banana, granola bar, or carrots, rather than something that needs utensils or preparation.
Choose refreshments that fit the session’s rhythm. A quick snack between tracks is easier than a meal that interrupts the room while the next take is being set up. If you prefer tea, bring your own tea bags and ask for hot water. Keep drinks away from microphones, headphones, instruments, and session files.
Singers can make hydration part of their preparation by drinking water in the days leading up to recording. Hot water or tea can also be a comfortable choice during a vocal session. Plan food and drink around your needs, and bring enough for the time you expect to spend in the studio.
What should you wear and bring for comfort during a long studio session? Choose comfortable clothes that allow you to move freely, plus shoes suited to standing. Pack a warm shirt or light hoodie in case the room feels cool, along with water and simple snacks you can reach between takes.
Small comforts matter when you’re staying present through repeated takes. Bring a snack that won’t leave crumbs near equipment, and choose a bottle with a secure lid. Comfortable clothing and a warm layer can help you stay focused while reviewing playback in headphones.
Keep refreshments in one place, separate from instruments and recording equipment. Then, when a new idea comes up or the producer is ready to capture another pass, you can step back into the session without searching through bags. Thoughtful preparation keeps your attention on the performance and the tracks taking shape.
Starsound Studios: Stereo Mixing
Starsound Studios offers Stereo Mixing for artists ready to shape recorded tracks into a cohesive, balanced presentation. Bring your prepared session files, reference tracks, and notes about the sound you’re aiming for. Clear materials help connect the mix to your creative direction, from vocal placement to the feel of the instrumental layers.
If your recordings are complete, Stereo Mixing can help bring the elements together; Mastering is another step toward a finished release. For a more immersive format, Starsound Studios also offers Dolby Atmos Mixing (9.1.4). The right next step depends on the project’s stage and intended listening experience.
Contact Starsound Studios to discuss your project, or visit starsoundstudios.com.
Shape Your Next Step in the Studio
Knowing what to bring to a recording session is part of building a creative process you can trust. The next step is deciding how your recorded performance should reach listeners. Consider the feeling you want the finished track to carry, then bring that intention into conversations about production.
Starsound Studios offers Stereo Mixing to shape the balance and character of your tracks, Mastering to prepare a finished mix, and Dolby Atmos Mixing (9.1.4) for immersive audio projects. Each stage serves a different purpose, so your project’s direction can guide where you focus next.
Bring your vision, your questions, and the music you’re ready to develop. Contact Starsound Studios to plan your session and explore the right next step for your sound. Your preparation has set the stage. Now let the music move forward.
Frequently Asked Questions
What should musicians bring to a recording session?
Bring the instrument you’ll perform with, plus the materials needed to play your parts confidently. Planning what to bring to a recording session can also mean packing a set list, a charged phone or tablet for approved playback, and a way to take notes. If you’re in a band, label cases and keep each musician’s accessories together, so setup stays orderly.
Should I bring extra strings, picks, cables, batteries, and accessories?
Yes, pack spares that match your instrument and setup. A guitarist might bring picks suited to different playing styles, while an electronic instrument player can carry the batteries their device uses. Coil cables neatly and keep them separate from fragile gear. Before leaving, test essential accessories at home so a damaged lead or dead battery doesn’t surprise you during setup.
What food and drinks can I bring to a recording studio?
Choose easy-to-handle refreshments that won’t interrupt a take or leave residue near equipment. Bring a bottle with a secure cap and snacks in quiet, resealable packaging. Open noisy wrappers during a break, not beside an active microphone. Keep food and drinks in a designated area, away from instruments, control surfaces, and recording equipment.
How early should I arrive, and how should I prepare for a recording session?
The material gives no exact arrival time; allow time to connect your drive, confirm playback, and resolve basic setup issues before recording. Prepare your project files and send them to the engineer at least 48 hours ahead, then bring your instrument, backups, lyrics, reference tracks, notes, water, and snacks.


