

A shorter reverb can create believable space without washing out a mix. A reverb time under 1 second adds room-like complexity and realism, while times greater than 1 second can help move an instrument or vocal farther back. Using reverb to create depth in a mix is less about adding a long tail to everything and more about controlling the relationship between the dry signal and the reflections around it.
You may know the familiar trade-off: more reverb can make a track feel spacious, but it can also blur transients, soften detail, and crowd the vocal. Depth doesn’t require a long, obvious tail. With thoughtful timing and a balanced send, even a compact ambience can give a sound a clear place in the mix.
This guide explains how to use reverb time and RT60 to shape front-to-back perspective, then shows how pre-delay, early reflections, delay, and filtering help preserve clarity. You’ll learn practical ways to place near, mid, and distant elements, and how to decide when a short tail is enough.
Key Takeaways
- Shape near, mid, and distant placement by adjusting pre-delay and the balance between early reflections and the reverb tail.
- Filter reverb returns to control low-end buildup and soften bright tails that can compete with vocals or percussion.
- Use a shared room sound to make selected instruments feel as though they belong in the same acoustic space.
- Choose RT60 and reverb length to support the song’s sense of perspective, then refine the result by listening in context.
Combining mix perspective and balance with reverb and delay
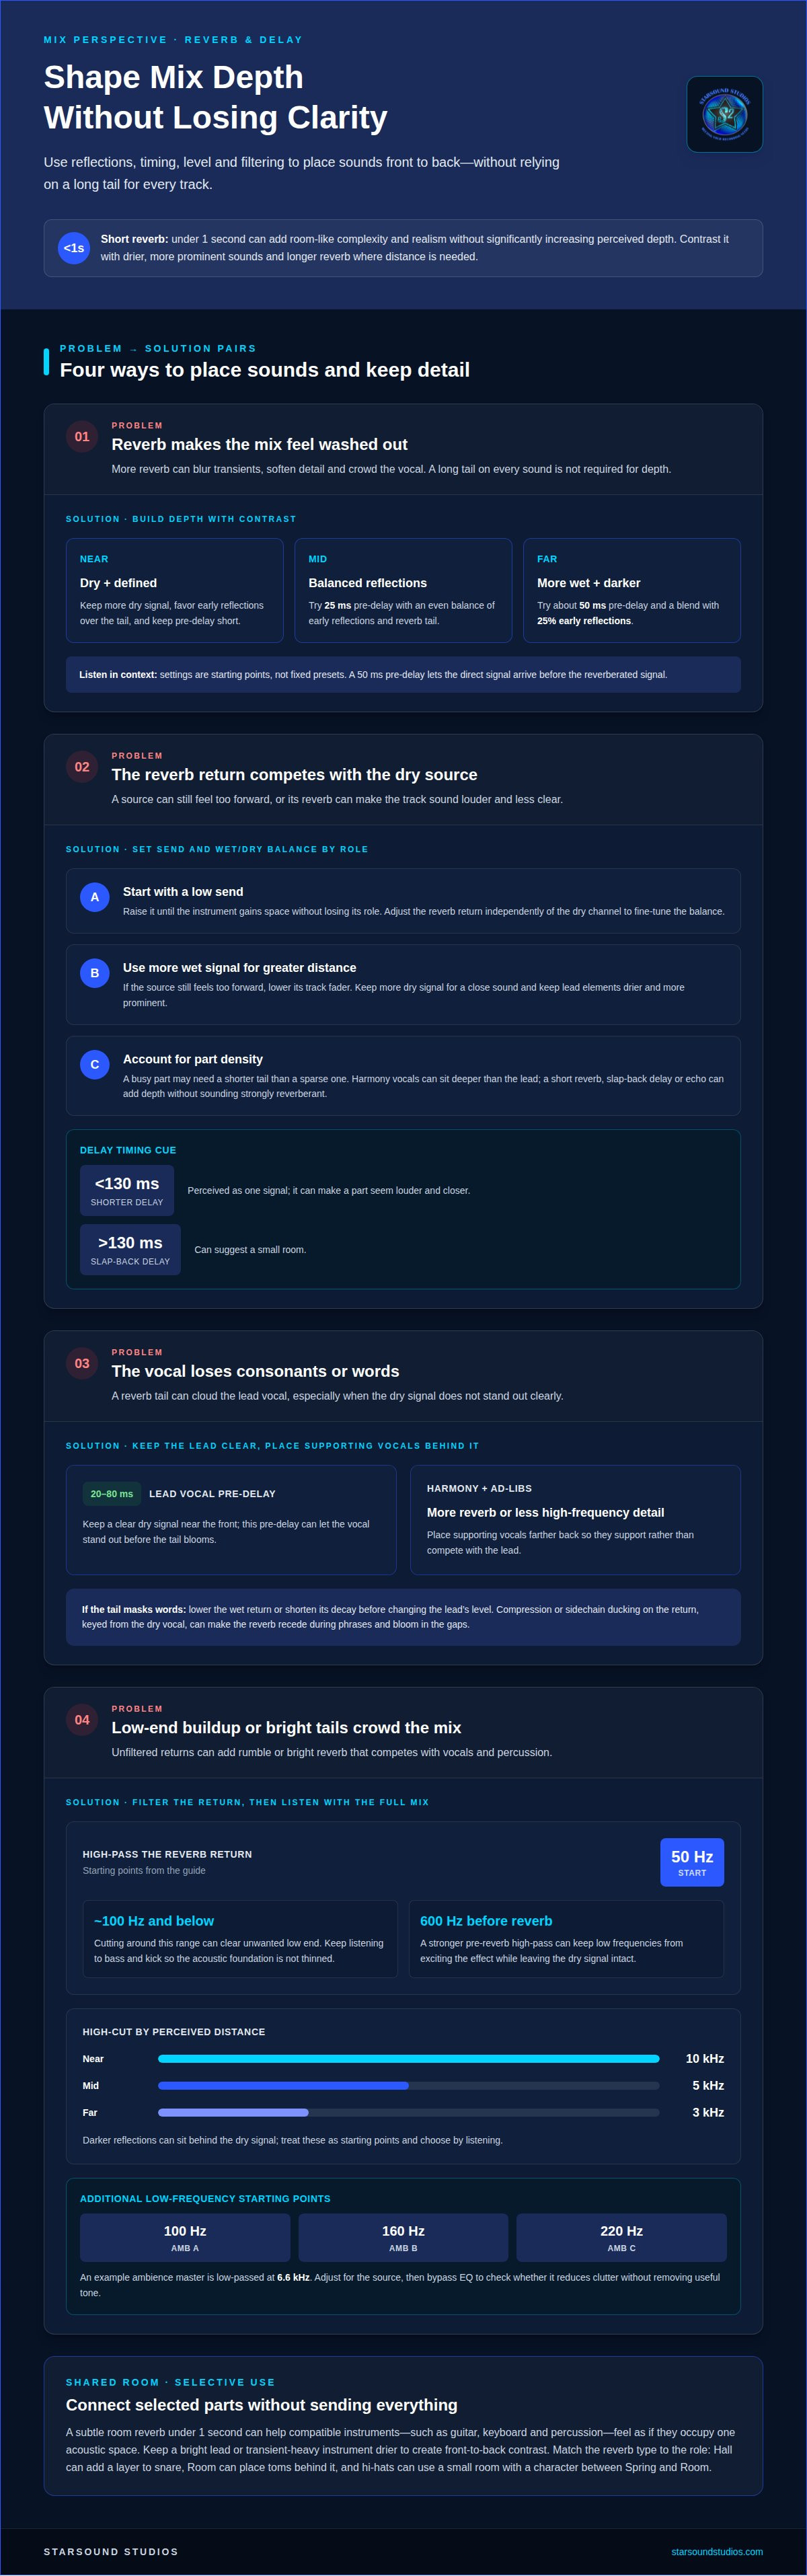
Shape each track’s perceived distance with its level, reflections, and reverb tail, then judge the result in the full mix. Treat the settings below as starting points for perspective, not fixed presets.
-
Set Reverb Send Levels
Start with a low send and raise it until the instrument gains space without losing its role. More reverb combined with a lower track fader can place a part farther back; keep a lead element drier and more prominent. For example, send harmony vocals deeper than the lead. A short reverb, slap-back delay, or echo can add depth without making a track sound strongly reverberant.
Set send levels according to each instrument’s role and density: a busy part may need a shorter tail than a sparse one. Adjust the reverb return independently of the dry channel to fine-tune the balance and preserve clarity.
-
Balance Early Reflections and Reverb Tails
Choose the early-reflection-to-tail balance to define distance. For a near ambience, favor early reflections over the reverb tail and keep the pre-delay short. For a mid position, try 25 ms and an even balance. For a far position, use about 50 ms and a blend with 25% early reflections. These settings shape perception; listen immediately in context.
A 50 ms pre-delay lets the direct signal arrive before the reverberated signal. Keep drums punchy with shorter pre-delay, and avoid a long tail that masks rhythmic detail.
-
Adjust Wet and Dry Signals
Increase the wet signal relative to the dry one to suggest greater distance, then lower the track fader if the source still feels too forward. Keep more dry signal for a close sound. Delays shorter than 130 ms are perceived as one signal and can make a part seem louder and closer; a slap-back delay greater than 130 ms can suggest a small room.
To keep vocal reverb from clouding consonants, use compression or sidechain ducking on the return, keyed from the dry vocal. The reverb recedes during phrases, then blooms in the gaps.
-
Place Vocals Without Losing Clarity
Keep the lead vocal near the front with a clear dry signal, then add a restrained reverb send for space. A pre-delay of 20 to 80 milliseconds can let the dry vocal stand out before the tail blooms. Place harmony and ad-lib vocals farther back with more reverb or less high-frequency detail, so they support rather than compete with the lead.
Check the vocal against the instrumental during mixing. If the reverb tail masks words, lower the wet return or shorten its decay before changing the lead’s level.
EQ and filtering reverbs to reduce muddiness and clutter
Start by filtering the reverb return, not the dry signal. Excess low-end buildup and bright tails that mask vocals are common problems; targeted high-pass and low-pass filters can help address both.
-
Filter Low Frequencies from Reverb Returns
Insert a high-pass filter on the return, then raise its cutoff until rumble and low-frequency buildup recede. A starting point of 50 Hz lets you increase the cutoff gradually; cutting around 100 Hz and below can also clear unwanted low end. Keep listening to the bass and kick alongside the reverb, so the treatment doesn’t thin the acoustic foundation.
For a stronger pre-reverb technique, place a 600 Hz high-pass filter before the effect. This can keep low frequencies from exciting the reverb while leaving the dry signal intact. Use it selectively on vocals or other sources whose low-end energy clouds the production.
-
Shape Reverb Returns with EQ
Set the return’s high-cut according to its intended distance: try 10 kHz for near ambience, 5 kHz for mid ambience, and 3 kHz for far ambience. Darker reflections can sit behind the dry signal, while a brighter return preserves presence. Compare each setting during listening, then choose the version that supports the source without drawing attention to the effect.
Use low-frequency starting points of 100 Hz for AMB A, 160 Hz for AMB B, and 220 Hz for AMB C. An example ambience master is low-passed at 6.6 kHz. Treat these as starting points, not fixed targets: adjust for the source, then bypass the EQ to hear whether it reduces clutter without removing useful tone.
For a cohesive final balance, professional mix refinement can help align ambience and clarity across the production.
How do Short Reverb Times Contribute to Depth?
A reverb time under 1 second can add room-like complexity and realism without significantly increasing perceived depth. Create perspective by contrasting that shared ambience with drier, more prominent sounds and longer reverb where the arrangement needs distance.
- Choose a short room reverb when the recording feels too dry or disconnected. Set the decay under 1 second, then send compatible instruments to the same plugin return. A shared room is one practical way of using reverb to create depth in a mix: guitar, keyboard, and percussion can feel as though they occupy one acoustic space. Keep the return subtle so it supports the sounds rather than becoming a separate feature.
- Use a shared reverb to unify selected parts, rather than automatically sending every track to it. For example, send rhythm guitars and percussion to one room, while leaving a bright lead or transient-heavy instrument drier. This contrast creates a front-to-back cue, while shared reflections help selected instruments feel connected. The effect should have an audible purpose in the full arrangement.
- Match the reverb type to each instrument’s role. A Hall setting can add a reverb layer to snare, while a Room setting can place toms behind it. For hi-hats, try a small room size and a reverb character between Spring and Room. Compare the sounds in stereo: a short tail can add space without masking the center of the recording.
- Build depth through contrast instead of expecting a short tail to move every source backward. Keep foreground sounds clear and dry, then add room ambience to supporting instruments. If a part needs more distance, choose a longer reverb for that part rather than extending the shared room across the mix. That is the core of using reverb to create depth in a mix: give each element a distinct place while preserving separation.
Using reverb time and RT60 to create depth
RT60 describes how long reverb takes to decay, while pre-delay sets the gap before reflections arrive. Balance both across tracks to create dimensional space without letting reverb blur the arrangement.
-
Set Reverb Time and RT60
Choose the decay time according to how far each element should seem from the listener. A medium reverb can start around 1.2 seconds, while a long reverb can begin at 2 seconds or longer. Reverb times greater than 1 second can help an instrument or vocal feel farther away. Listen across the arrangement, since overlapping tails can soften detail and crowd the balance.
Adjust one return at a time. For instance, let a sustained pad carry a longer decay than a rhythmic guitar part. The pad’s tail can extend the space, while the guitar remains defined. Judge the RT60 in the full mix, not only in a soloed channel.
-
Adjust Pre-Delay and Decay Time
Use pre-delay to control the gap between the direct sound and its reverb. A longer gap lets the dry attack register first, preserving definition while the tail suggests distance. A shorter gap blends reflections more closely with the source. Pair pre-delay with decay time: longer tails generally suggest greater distance, while shorter ones keep elements more immediate.
For example, keep a plucked part’s attack distinct, then extend its decay only enough to place it behind the lead. If the tail overlaps the next phrase, shorten the decay before raising the dry track level.
- Compare reverb time with arrangement density. In a sparse passage, a long tail can give a vocal or synth dimension; in a busy section, the same decay may mask transients. Automate the return between sections when the song needs different spaces, and use panning to separate sustained elements from the center.
- Make the final decision in context. Mute the reverb return, then restore it and listen for whether the intended distance disappears. If the mix merely sounds louder, lower the return and reassess. The clearest sense of depth comes from contrast among dry tracks and tracks with medium or long decay.
Starsound Studios
Starsound Studios can help shape reverb, balance, and front-to-back perspective through careful mixing. If short tails add space but leave the arrangement feeling flat, or longer decays blur important details, a focused mix can bring those elements into clearer relation. Stereo Mixing and Remote Mixing support projects being refined for a defined stereo image, while Dolby Atmos Mixing (9.1.4) offers an immersive format for productions designed to use it. Mastering can refine the finished balance as the project moves toward release. The right next step depends on where your track is in its production process and what you want listeners to hear. For a collaborative approach to your mix, contact Starsound Studios to discuss your project.
Carry Your Mix Forward with Intention
A more intentional approach to using reverb to create depth in a mix starts with the emotional perspective you want listeners to experience. Decide what should feel intimate, what should sit behind the lead, and where the production can open up. Let every space serve that artistic direction rather than treating ambience as an effect added at the end.
As your track develops, listen for how its atmosphere supports the performance and arrangement. A mix can feel expansive without losing its focus, and subtle spatial choices can help the song’s character come through. If you’re ready for experienced ears on your project, contact Starsound Studios to discuss the next step.
Keep experimenting, follow the feeling the song calls for, and give its depth room to breathe.
Frequently Asked Questions
Why are Width and Depth Important?
Width separates sounds across the left-to-right stereo field, while depth helps listeners perceive which elements are near or far. Together, they make arrangement layers easier to distinguish. For example, a centered lead vocal can feel forward while wide backing harmonies create space around it. If every sound is equally wide and present, the mix can lose a clear focal point.
Which reverb types work best for front-to-back placement?
Room, hall, plate, and spring reverbs can all support front-to-back placement, depending on the sound and arrangement. A room setting can create a compact sense of shared space; a hall can give sustained parts a more expansive quality. Plate can add a smooth, prominent texture to vocals, while spring can bring distinctive character to guitars. Compare each return with the dry source to find the right fit.
How do EQ and filtering on a reverb return improve depth?
EQ helps a reverb return sit behind or around its source without competing for the same tonal space. For example, reducing brightness on a background vocal’s return can make it feel less forward while preserving the lead’s clarity. Filtering can also distinguish ambience from the dry signal. Make small changes with the full arrangement playing: a return that sounds appealing on its own may crowd other elements.
How can early reflections and reverb tails be balanced?
Use early reflections to suggest the source’s immediate surroundings and the tail to add lingering space. For a crisp, rhythmic part, emphasize the initial room response and keep the decay from masking later hits. A sustained pad can carry more tail without obscuring transients. Adjust both components while listening to the entire phrase, not just one note or hit.
When should you use mono, stereo, or panned reverb?
Choose mono reverb when you want ambience to stay focused near a centered source, such as a lead vocal. Stereo reverb can spread a pad or supporting texture across the image. For added separation, pan a mono instrument and its mono reverb to opposite sides. Check the result in mono as well, so the spatial effect doesn’t weaken the source’s focus.


