

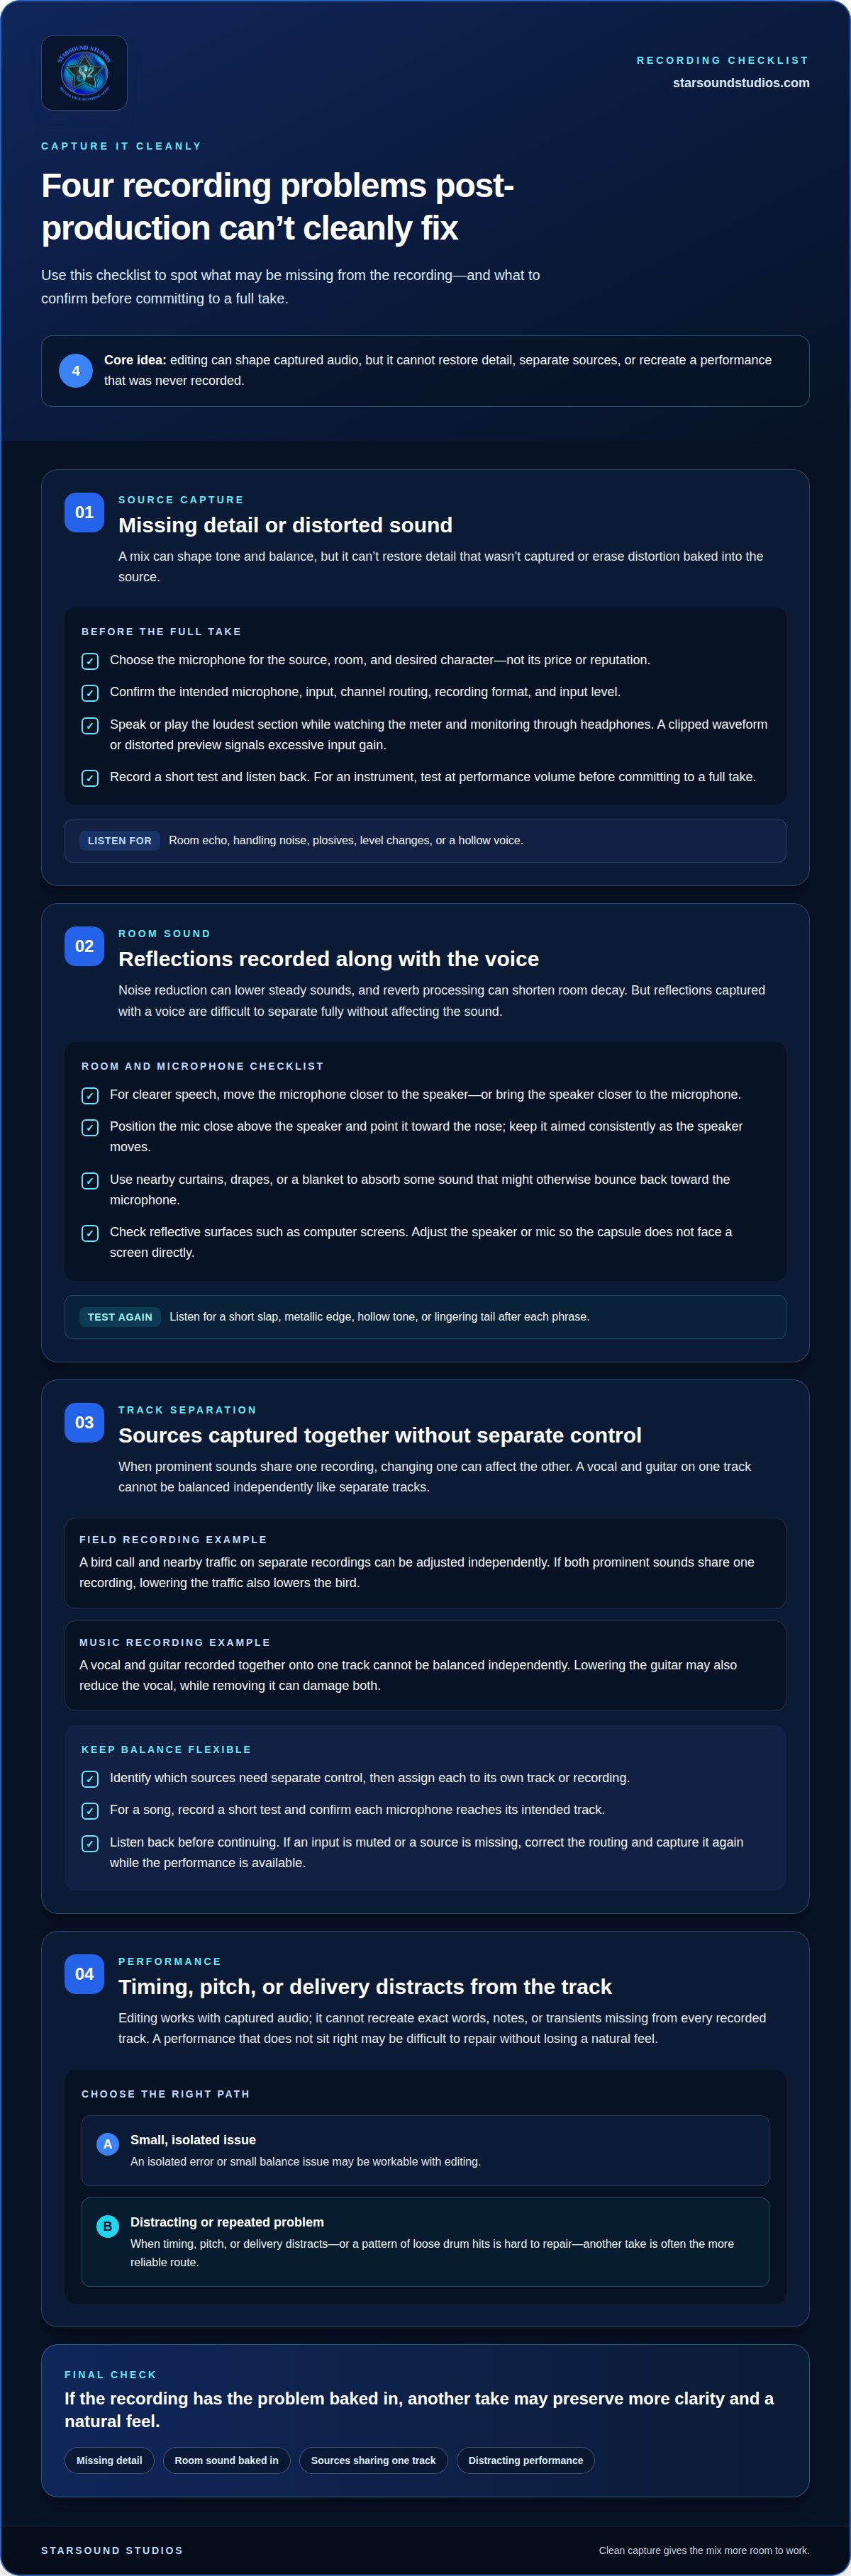
Four recording mistakes are especially difficult to repair in post: poor microphone capture, distracting room reflections, multiple sources recorded together without separate level control, and performances with obvious timing or pitch problems. Some recording mistakes that can't be fixed cleanly may still be improved with editing, but another take often preserves more clarity and a natural feel.
It’s tempting to keep a take and trust the mix to solve everything. The right choice depends on what was captured: a small balance issue may be workable, while missing detail, room sound baked into the recording, or a musical part that doesn’t sit right can resist correction. This guide explains four common trouble spots, why each is difficult to repair, and when recording again is the more reliable path to a polished result.
Key Takeaways
- Improve clarity at the source by choosing and positioning the microphone with the sound you want to capture in mind.
- Keep distinct sound sources separate when you may need to adjust their levels independently later.
- Reduce room reflections during recording, since captured reverb can be difficult to remove without affecting the sound.
- Choose another take when timing, pitch, or performance issues distract from the track and editing would compromise its natural feel.
1. Neglecting microphone choice and sound quality
A microphone captures the intended voice or instrument along with its distance, direction, and surrounding sound. Poor placement can make vocals sound thin, distant, or overly roomy. Excessive distance leaves less direct sound for the mix. For clearer speech, move the microphone closer to the speaker, or bring the speaker closer to the microphone.
Microphone choice matters, too. A sensitive condenser may pick up unwanted room tone when recording quiet speech in a reflective room. A loud guitar amplifier needs careful placement to avoid harsh or unbalanced tone. Choose a microphone for the source, room, and desired character, not its price or reputation.
Before recording audio or filming, confirm the selected input and channel routing. When working with professional cinema and video rigs, broadcast gear specialists such as United Broadcast & Media Solutions (UBMS) recommend double-checking the recording format and input levels directly in the camera menu. Speak or play the loudest section while watching the meter and monitoring through headphones. A clipped waveform or distorted preview signals excessive input gain. Make sure the intended microphone is active, not the laptop or camera’s built-in mic. Record a short test and listen on headphones before capturing the full performance.
For a practical sound check, ask a friend to record a short sample of you speaking and send it back for review. Listen for room echo, handling noise, plosives, and level changes as you turn. If the voice sounds hollow, reposition the microphone and repeat the test. If consonants disappear, adjust the angle and distance.
A clean capture starts with a repeatable setup. Mark the mic stand position, aim the capsule consistently, and secure the cable against bumps. For an instrument, record a brief phrase at performance volume and listen back before committing to a full take. A mix can shape tone and balance, but it can’t restore detail that wasn’t captured or erase distortion baked into the source. These are recording mistakes that can’t be fixed cleanly after capture.
2. Problems that cannot be fixed in post
Post-production can shape recorded sound, but it can’t restore a performance that never reached a microphone. As video post-production and authoring specialists like 3duxmediahub.com.au frequently note, equalization, compression, and editing work with captured audio. They can’t recreate exact words, notes, or transients missing from every recorded track. A distorted or incomplete source also limits how natural any repair can sound.
Missing audio or a muted microphone usually can’t be recovered from that file alone. If another microphone, camera, or backup recorder captured the performance, its track may preserve usable sound. For example, a camera’s built-in mic might have captured room audio while a muted vocal mic recorded nothing. That backup won’t necessarily match the intended sound, but it gives editing something to work with.
When recording in the field, separate distinct sound sources if they need independent level control. A bird call and nearby traffic captured on separate recordings can be adjusted independently. If both prominent sounds share one recording, lowering the traffic also lowers the bird. Editing may reduce some unwanted sound, but it can’t provide independent level control that the original recording never captured.
This limitation applies to music, too. A vocal and guitar recorded together onto one track can’t be balanced independently like separate tracks. Lowering the guitar may also reduce the vocal, while removing it can damage both. A fresh take with separate microphones or tracks gives the mix more control. The goal isn’t to capture every source in isolation, but to preserve flexibility where balance matters.
Before recording, identify which sources need separate control, then assign each to its own track or recording. In a field session, capture one sound source at a time when independent levels matter. For a song, record a short test and confirm each microphone reaches its intended track. Listen back before continuing. If an input is muted or a source is missing, correct the routing and capture it again while the performance is available. That pause protects the choices the mix will need later.
3. Room reflections and reverb
Background noise and room echo can be reduced in post, but removal has limits. Noise-reduction tools can lower steady sounds such as a fan, while reverb processing can shorten audible room decay. Neither can fully separate a voice from reflections captured alongside it. When reflections smear consonants or create a hollow tone, the microphone has recorded direct sound and room sound together.
Microphone placement can reduce how much of the room enters a recording. Position the microphone close above the speaker and point it toward the nose. This angle favors the voice while limiting some reflections from nearby surfaces. Keep the mic aimed consistently as the speaker moves. Turning away can change the balance between direct voice and room ambience. Listen to a short test recording before capturing the full performance.
Soft materials near the speaker can help reduce reflections. Curtains, drapes, or a blanket absorb some sound that might otherwise bounce back toward the microphone. For example, a bare wall behind a narrator may produce a distinct echo, while a curtain near that wall softens the reflection. Keep the fabric close enough to affect the surrounding space without letting it touch the microphone or obstruct the performance.
Look beyond the walls. One or two computer screens near a speaker can act as reflective surfaces, sending sound back into the mic. Adjust the speaker or microphone position so the capsule doesn’t face a screen directly. Then record another test and listen for a short slap, metallic edge, or lingering tail after each phrase. If those reflections remain strong, changing the room setup or capturing another take is more effective than asking processing to erase the room completely. A cleaner source gives later mixing more room to shape the voice without making it sound thin or unnatural.
4. When to record another take
Choose another take when timing, pitch, or delivery distracts from the performance. A small, isolated error may be suitable for an edit, while a pattern of loose drum hits can be harder to repair. Drum microphones capture sound from several parts of the kit, so correcting a kick can mean editing multiple tracks. That adds work, and edits can disrupt the performance’s feel.
Chordal parts also call for careful judgment. Pitch-correction software can struggle to identify rhythm guitar because chords contain multiple notes. A flubbed chord may affect the whole phrase, making a fresh performance cleaner than forcing a correction. If a player loses their place while tracking to a tempo, another take can restore a confident, connected passage.
For narration, listen to the repaired passage in context. If a corrected word doesn’t blend with the original, rerecord the whole sentence or paragraph. Differences in tone, pace, or emphasis can make a narrow edit stand out. A complete phrase often carries the speaker’s natural momentum more convincingly.
Prevent avoidable audio and video problems by checking the recording setup before the full performance, then listening to playback afterward. A camera preview can look fine while the audio reveals a muted mic, unwanted noise, or a missed line. For a band, prioritize a tight rhythm-section performance while energy is high; aiming to capture it within the first three takes can help preserve that feel.
Use a practical decision: if the flaw is brief, isolated, and masked by the surrounding performance, editing may work. If it repeats, disrupts the groove, or changes the emotional delivery, record again. Don’t keep a take only because it’s already captured. For a focused session that gives strong performances room to happen, plan your next recording session.
Give playback your full attention: sound problems may not show up in the video. A sloppy drum track is difficult to repair because drum microphones capture sound from multiple parts of the kit. Correcting kick timing can therefore require edits across multiple tracks. When recording to a tempo, a mistake can also make it difficult to recover the part and get back on track.
Starsound Studios: Recording
Starsound Studios records artists in Cleveland, Ohio, with attention to capturing a strong performance before mixing begins. A focused session addresses microphone placement, room sound, input routing, and performance choices at the source, where they have the greatest effect on the final track.
If you already have recorded tracks, Stereo Mixing and Mastering can shape and finalize them. For projects designed for immersive playback, Dolby Atmos Mixing (9.1.4) provides another production path. The right next step depends on what you have recorded and what you want the finished work to sound like.
When a take has a persistent capture or performance problem, another recording may be more useful than trying to repair it in the mix. Contact Starsound Studios to discuss your recording project in Cleveland.
Give the Next Take a Stronger Foundation
A recording session is a chance to make creative choices with the finished sound in mind. Take time to shape the performance and capture a source that feels true to your intent. Some recording mistakes that can’t be fixed cleanly in post are best handled with a fresh take, while other projects are ready to move forward into mixing.
Starsound Studios can support the next stage with Stereo Mixing, Mastering, or Dolby Atmos Mixing (9.1.4). The right direction depends on your tracks and the listening experience you want to create. A thoughtful production process keeps the focus on the music, from the energy of the performance to the detail of the final mix.
Ready to talk through your project and its next step? Contact Starsound Studios. Keep refining your sound, and let the next take move your vision forward.
Frequently Asked Questions
What recording mistakes are impossible to fix in post-production?
Some recording mistakes that can't be fixed cleanly include missing source audio, severe clipping, and a performance captured with the wrong words or notes. Editing can rearrange existing material, but it can't recreate an unrecorded guitar phrase. If a singer’s final word falls outside every microphone’s pickup, a room mic or backup track helps only if it captured that word clearly.
Which audio recording problems can be repaired and which cannot?
Problems on separate, clean tracks are usually easier to repair. An engineer may edit a brief level imbalance, a small timing slip, or a click between phrases without changing the entire performance. Missing instrument parts, severe distortion, or unwanted sound printed onto the same track are harder to fix because the desired signal can’t be isolated reliably. Judge a proposed repair in the full arrangement, not only in solo.
Can clipping or distorted audio be fixed after recording?
Restoration tools can sometimes soften clipping, but severely clipped peaks lose waveform detail that processing can’t fully recreate. If a vocal’s loud syllable sounds crunchy, compare the original with a corrected preview at the same playback level. If distortion remains obvious or changes the vocal’s tone, use an unclipped backup or rerecord the passage. Intentional saturation differs from accidental digital clipping, so identify the source first.


