
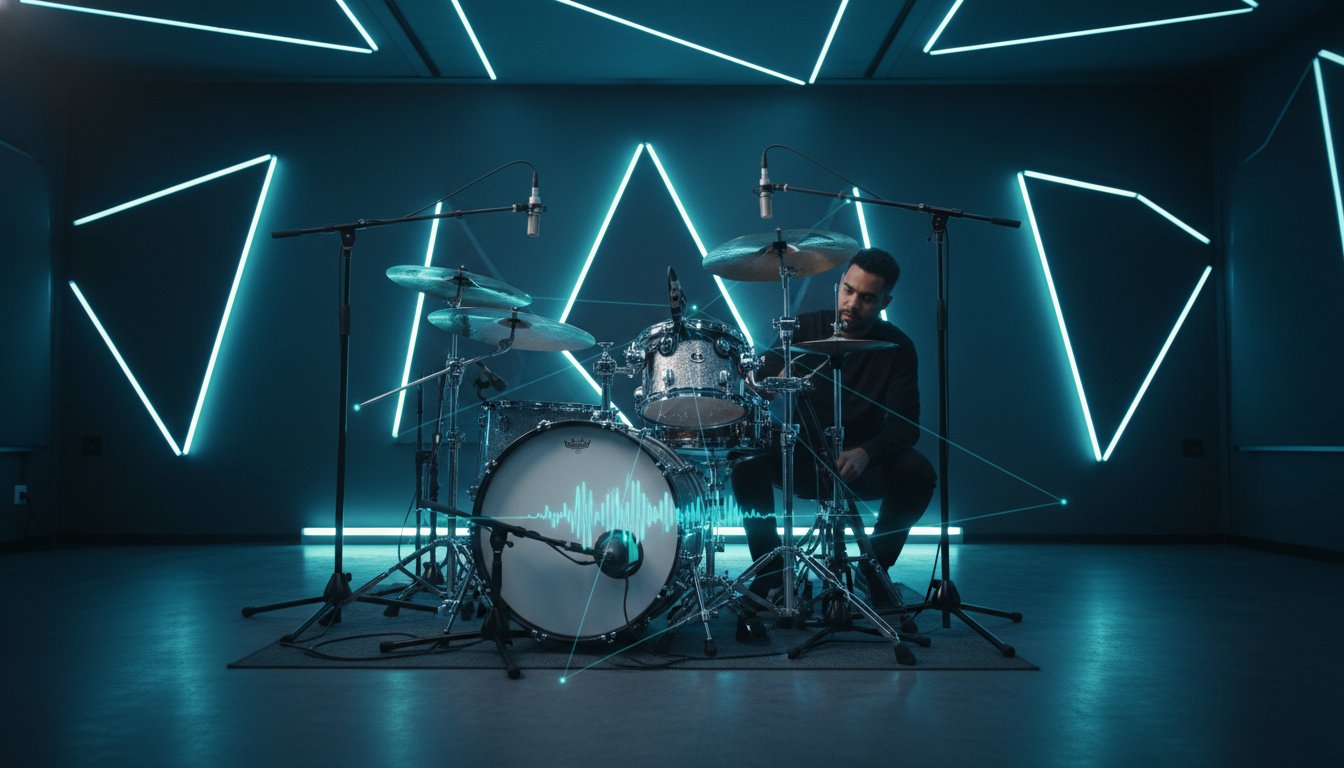
What if the secret to a radio-ready drum sound isn't found in your favorite plugin folder, but in a tape measure and a basic understanding of physics? It's a common frustration for even the most passionate creators. You capture a performance that feels electric in the tracking room, yet the playback reveals a thin snare that disappears and a kick drum stripped of its low-end punch. Those swirly, "phasey" cymbals can turn a high-energy session into a tedious exercise in damage control. We've all been there, and we know that technical friction is the ultimate enemy of the creative spirit.
The good news is that phase isn't a ghost to be feared. It's a relationship to be managed through intentional geometry. This guide will show you how to avoid phase issues when recording drums by mastering your mic placement from the ground up. You'll gain the precision needed to capture tracks that are punchy, cohesive, and ready for a professional stereo or Dolby Atmos mix. We will explore the 3:1 rule, overhead alignment strategies, and the physical behavior of sound waves. By the end, you'll have the confidence to place every microphone with intent, ensuring your technical foundation is as rock-solid as the performance itself.
Key Takeaways
- Learn how to identify comb filtering before it drains the life from your tracks, ensuring you recognize the sonic signatures of thin snares and hollow kick drums.
- Master the geometry of the 3:1 rule and time-distance relationships to avoid phase issues when recording drums with professional precision.
- Discover why overheads serve as your sonic foundation and gain a repeatable framework for aligning spot mics to maintain a cohesive, punchy image.
- Implement the "Solo and Flip" audit to verify polarity, ensuring every microphone works in harmony rather than fighting for space in the frequency spectrum.
- Capture radio-ready drum sounds that translate perfectly to the mix, saving you hours of technical correction during your next creative session.
What is Audio Phase and Why Does It Kill Your Drum Sound?
Phase is the invisible architecture of your drum sound. At its core, phase describes the time relationship between two or more audio signals. When you're miking a drum kit, you aren't just capturing one source; you're capturing dozens of reflections and direct sounds hitting multiple diaphragms at slightly different times. This temporal dance determines whether your snare cracks like a whip or thuds like a wet cardboard box. To truly avoid phase issues when recording drums, you must treat every microphone as part of a single, unified instrument rather than a collection of isolated channels.
When these signals don't align, you encounter the dreaded "phasey" sound. It's an amateur sonic signature that feels hollow, thin, and uninspiring. It saps the energy from a performance, making the artist's hard work sound small and distant. While many engineers reach for the "phase flip" button on their preamp, it's vital to distinguish between polarity and phase. Polarity is a binary electrical flip, reversing the positive and negative terminals. Phase is a linear time delay caused by physical distance. You can't always fix a distance problem with an electrical switch. It requires a deeper understanding of the physics in the room.
The Science of Comb Filtering
When two signals are 180 degrees out of step, their peaks and troughs cancel each other out. This creates a specific sonic artifact known as comb filtering. If you look at a frequency analyzer, you'll see a series of deep notches that look like the teeth of a comb. What is a Comb Filter? Essentially, comb filtering is the destructive interference of sound waves that removes specific frequencies from your signal. This phenomenon is why your overheads might sound "swirly" or why your snare loses its fundamental "thump" when you bring up the bottom mic. It creates a technical barrier that even the best mixing can't always overcome.
Constructive vs. Destructive Interference
In a perfect world, your microphones work in constructive interference. This is where the waveforms reinforce one another, creating a thicker, more resonant sound. Low frequencies, like those in your kick and snare, have longer wavelengths, making them particularly vulnerable to timing discrepancies. If your kick drum mics aren't aligned, the low-end energy literally vanishes into thin air. Achieving phase coherence is the only way to ensure professional stereo imaging and a kit that feels like it's sitting right in front of the listener. When you learn to avoid phase issues when recording drums, you're not just fixing a technical error; you're protecting the emotional impact and the spirit of the music.
The Physics of Drum Miking: Managing Time and Distance
Sound is physical. It takes time to travel through the air, moving at approximately 1,130 feet per second. In the context of a recording studio, this translates to roughly one foot per millisecond. While a millisecond sounds negligible, it is the difference between a snare that hits with impact and one that feels blurred. When you place a microphone three inches from a snare head and another four feet away as an overhead, the sound arrives at different times. This temporal gap is the primary reason engineers struggle to avoid phase issues when recording drums. Close miking offers isolation, but it also creates a complex web of time delays that can lead to comb filtering in drum recording if not managed with geometric precision.
Room miking presents a different challenge. In a large space, reflections arrive much later than the direct signal, often creating a sense of depth rather than immediate cancellation. However, the closer your mics get to the source, the more critical the timing relationship becomes. Managing these milliseconds is the difference between a kit that sounds like a cohesive unit and one that feels like a collection of disjointed parts. It requires a shift in perspective. You aren't just placing microphones; you're mapping the movement of energy through a three-dimensional space.
Applying the 3:1 Rule to Drum Kits
The 3:1 rule is a fundamental principle of acoustic separation. It states that the distance between two microphones should be at least three times the distance from each microphone to the source it is capturing. If your rack tom mic is two inches from the drum head, the nearest adjacent microphone, perhaps the snare mic, should be at least six inches away. This ratio ensures that the leakage into the second microphone is low enough in volume that it won't cause audible destructive interference. There are times to break this rule, such as when you're chasing a trashy, lo-fi vibe. For a professional, radio-ready sound, sticking to this math provides a clean foundation. Our engineers at Starsound Studios utilize these principles to ensure every track is mix-ready from the moment it's tracked.
The Snare-Centric Geometry Technique
The snare drum is the heartbeat of the modern kit. It defines the center of your stereo image. If your overhead microphones are not equidistant from the center of the snare, the snare's transient will arrive at one microphone before the other. This results in "smearing," where the snare appears to pull toward one side of the speakers. To prevent this, use a piece of string or a measuring tape. Hold one end at the center of the snare drum and extend it to the capsule of the left overhead. Maintain that exact length and move to the right overhead. By ensuring both capsules are the same distance from the snare, you lock the drum into the center of your stereo field. This simple geometric fix is one of the most powerful ways to avoid phase issues when recording drums and maintain a focused, powerful sound.
Practical Mic Placement Framework to Prevent Phase Issues
The overheads are the foundation of the modern drum sound. Instead of treating them as mere "cymbal mics," think of them as the primary image of the entire kit. Every other microphone you add is a "spot mic" designed to reinforce what the overheads are already capturing. By starting with a phase-coherent overhead pair, you establish a solid center. If the overheads are out of alignment, no amount of processing on the close mics will fix the hollow, disjointed result. Practical frameworks are essential to avoid phase issues when recording drums and ensure the kit feels like a single, powerful instrument.
Mastering the relationship between multiple mics on a single source is the next step in professional tracking. Consider the kick drum. An "inside" mic captures the beater's click and attack, while an "outside" mic captures the resonant "thump" and sub-frequencies. If these aren't aligned, the click will arrive at the DAW before the thump, causing a smeared, weak transient. Similarly, room microphones should be placed with intention. Use distance to your advantage; placing room mics at a significant distance creates a distinct delay that our ears perceive as depth rather than destructive interference. For those seeking a masterclass in phase-coherent minimalism, the Glyn Johns technique remains a gold standard, utilizing just three or four mics to capture a massive, natural image.
Phase-Proofing the Snare and Kick
When you place a microphone on the top of a snare and another on the bottom, the diaphragms are moving in opposite directions relative to the sound source. As the stick hits the top head, it moves away from the top mic and toward the bottom mic. Flipping the polarity on the snare bottom is a standard professional practice. This ensures the push and pull of the waveforms work in harmony rather than cancelling each other out. For the kick drum, try to align the capsules physically or use a sample-accurate delay in your DAW to lock the transients together for maximum impact. This attention to detail is what allows you to avoid phase issues when recording drums while maintaining a punchy, radio-ready low end.
Overhead Arrays: XY, Spaced Pair, and ORTF
Your choice of overhead array dictates the width and phase stability of the kit. Each method offers a unique perspective on the performance:
- XY (Coincident): The capsules are placed as close as possible at a 90-degree angle. This is the safest array for beginners because there is virtually no time arrival difference between the two microphones.
- Spaced Pair (AB): This offers a wide, cinematic stereo image but requires strict adherence to the snare-centric geometry discussed earlier to prevent the snare from drifting.
- ORTF: Capsules are 17 cm apart at a 110-degree angle, mimicking the human head. It provides a natural balance of width and phase coherence.
Always perform a "Phase Audit" by summing your overheads to mono. If the sound becomes thin or the snare disappears, your placement needs adjustment. Choosing the right array depends on the song's energy and the desired width of the final mix.

The Professional Phase Audit: How to Listen and Verify
Precision is the hallmark of a master engineer. Once you've applied your geometric framework, you must verify the results with a systematic audit. Just because a microphone looks correct doesn't mean the signals are working in harmony. The "Solo and Flip" method is your most reliable tool in the tracking room. By soloing your overheads and then adding individual spot mics one by one, you can listen for the immediate impact of the polarity switch. This isn't just about technical correctness. It's about preserving the emotional weight of the performance. When you learn to avoid phase issues when recording drums through critical listening, you ensure that every hit resonates with the intended power.
Critical listening requires you to focus on the fundamental frequencies. When two mics are in phase, the low end feels thick and centered. If they're out of phase, the sound becomes hollow, almost as if there's a "hole" in the middle of the kit. Beyond listening, visual inspection in your DAW can provide a secondary layer of assurance. Zooming into the waveforms in Pro Tools or Logic Pro allows you to see the transients. If the peaks of the kick drum move up in one channel and down in another, you've found a polarity conflict. While phase alignment plugins are available, they should be a last resort. Moving a microphone two inches is always superior to a digital calculation.
The Step-by-Step Phase Audit Workflow
Instead of guessing, follow a rigid order of operations to verify your setup. This workflow ensures that every element of the kit builds upon the foundation of the overheads:
- Overheads in Mono: Sum your overheads to mono and flip the polarity. Keep the setting that sounds the fullest and most robust.
- Kick Drum: Bring in the kick mics. Flip the polarity against the overheads. You're looking for the setting that provides the most "thump" in the low frequencies.
- Snare Alignment: Add the snare top. Check it against the overheads. Then, bring in the snare bottom and flip its polarity against the snare top.
- Toms and Rooms: Repeat this process for every tom and room microphone, always referencing the overheads as your timing "north star."
Source vs. Software: Why Physical Placement Wins
At Starsound Studios, we embrace a "Fix it in the Room" philosophy. While time-alignment plugins can nudge waveforms into place, they often strip away the natural "life" and air of a drum kit. Physical distance creates a sense of three-dimensional space that digital shifting can't fully replicate. This is especially critical for projects intended for Dolby Atmos Mixing (9.1.4), where the spatial relationship between microphones defines the immersive experience. Getting the phase right at the source creates a pristine foundation for our professional recording and engineering classes, ensuring your vision is captured with absolute fidelity from the very first take.
Starsound Studios: Elevating Your Drum Tracks in Cleveland
Capturing the perfect drum take is an emotional journey, but it must be built on a foundation of technical excellence. At Starsound Studios, located in the serene environment of North Royalton, our facility is meticulously designed for a perfect acoustic response. We understand that a creator's focus should be on the energy of the performance, not on the physics of the microphones. Our team handles the heavy lifting of geometry and signal flow, allowing you to avoid phase issues when recording drums from the moment you sit behind the kit. It's about providing a creative sanctuary where high-end technical precision meets artistic freedom.
Our engineering expertise goes beyond simply placing mics. We act as collaborative mentors, ensuring your vision translates into a world-class recording. With Steve "The Mix" at the helm, every session benefits from decades of experience in high-fidelity audio. Whether you're tracking for a traditional stereo release or a complex 9.1.4 immersive experience, our process ensures every transient is sharp and every frequency is aligned. This level of detail is also what we impart to students in our Audio Engineering Classes, where you can learn these critical techniques hands-on in a professional environment.
The Advantage of Professional Recording in Cleveland
Stepping into our studio gives you access to a signal chain that home setups often lack. We utilize high-end preamps equipped with physical polarity switches, allowing for immediate corrections during the audit process. Our tracking room is acoustically treated to enhance drum transients rather than muddying them with uncontrolled reflections. This clarity is essential for professional Recording and Stereo Mixing. By managing time and distance in the room, we eliminate the technical friction that often stalls creative momentum. You get a kit that sounds massive, focused, and ready for the radio.
From Stereo to Atmos: Future-Proofing Your Sound
In the modern industry, a stereo mix is often just the beginning. With the mainstream rise of spatial audio, phase coherence has become more critical than ever. In a Dolby Atmos Mixing (9.1.4) environment, phase issues that were barely audible in stereo can become "ghosts" that blur the immersive image. A poorly aligned snare might pull weirdly to the side or lose its impact in the overhead speakers. By prioritizing phase during the tracking stage, you're future-proofing your music for every playback format. It's the first step toward a world-class master that feels as big as your ambition. Ready for a pro sound? Book your session at Starsound Studios and experience the difference that precision makes.
Master the Geometry of Your Next Masterpiece
Capturing a drum sound that translates from the tracking room to the radio requires more than just high-end microphones. It demands a commitment to the physical relationships of sound. By mastering the 3:1 rule and maintaining snare-centric geometry, you transition from a technician to an architect of audio. You now have the framework to avoid phase issues when recording drums, ensuring your transients remain sharp and your low end stays massive. Every systematic audit you perform is a step toward a mix that feels cohesive, punchy, and professional.
When you're ready to move beyond technical troubleshooting and focus entirely on your creative energy, our North Royalton sanctuary is here to help. As Ohio’s only Dolby-certified Atmos studio, we provide the precision and atmosphere needed to future-proof your sound. Under the expert guidance of Steve "The Mix," your projects will benefit from engineering that prioritizes phase coherence from the very first strike. Elevate your sound with professional recording at Starsound Studios. Your music deserves a foundation of absolute fidelity, and we're excited to help you reach your highest potential.
Frequently Asked Questions
Is phase always a bad thing when recording drums?
Phase relationships are not inherently negative; they are actually what provide a drum kit with its sense of space and character. The goal is to manage these relationships intentionally to prevent destructive interference while allowing the natural timing differences between mics to create depth. You want to eliminate the "hollow" sound of cancellation while keeping the "air" that makes a recording feel three-dimensional and alive.
What is the difference between phase and polarity?
Polarity is a binary electrical flip of the signal's voltage, whereas phase is a linear measurement of time and distance. You can reverse polarity with a single button on your preamp or DAW channel. Phase is much more complex because it describes where a sound wave is in its cycle at any given millisecond. You can't truly "fix" a phase issue caused by distance with a polarity switch; you have to move the microphone.
How can I tell if my drums are out of phase just by looking at the screen?
You can identify phase conflicts by zooming deeply into your DAW's waveform display and comparing the transients of different tracks. Look for "mirrored" waveforms where one track's peak moves upward while the other moves downward at the exact same moment. If the initial transients are moving in opposite directions, the signals are out of polarity and will likely cancel each other's energy when summed together.
Does every snare bottom mic need its polarity flipped?
Almost every snare bottom mic requires a polarity flip because the microphone is physically facing the opposite direction of the snare top mic. When the drum is struck, the top head moves away from the top mic but toward the bottom mic. Reversing the polarity on the bottom channel ensures both signals move in harmony, which is an essential standard practice to avoid phase issues when recording drums.
Can I fix phase issues after the drummer has gone home?
You can use alignment plugins or manually nudge waveforms in your DAW to improve timing, but these are digital band-aids for physical problems. While software can align the initial hit, it often fails to account for the complex, frequency-dependent phase shifts caused by room reflections. Getting the placement right at the source is the only way to maintain the natural integrity and "life" of the drum kit.
What is the 3:1 rule for drum microphones?
The 3:1 rule is a geometric principle stating that the distance between two microphones should be at least three times the distance from each microphone to its specific source. If your rack tom mic is two inches from the drum head, the nearest adjacent mic should be at least six inches away. This ratio ensures that the volume of the bleed is low enough that any phase interference becomes virtually inaudible.
How does phase affect my drum mix in Dolby Atmos?
Phase coherence is absolutely vital in Dolby Atmos because timing discrepancies can cause blurred localization or "ghosting" within a 9.1.4 immersive field. In a traditional stereo mix, phase issues might just make the kit sound thin. In a spatial environment, they can physically confuse the listener’s perception of where the sound is coming from. Precision tracking is necessary to avoid phase issues when recording drums for immersive formats.
Do I need expensive microphones to avoid phase issues?
No, you don't need boutique equipment to achieve a phase-coherent drum sound. Phase is a matter of physics, geometry, and time, none of which are determined by the price of your gear. A pair of affordable microphones placed with a tape measure and a critical ear will always outperform a mismatched set of expensive mics placed haphazardly. Focus on your placement technique rather than your equipment budget.


