
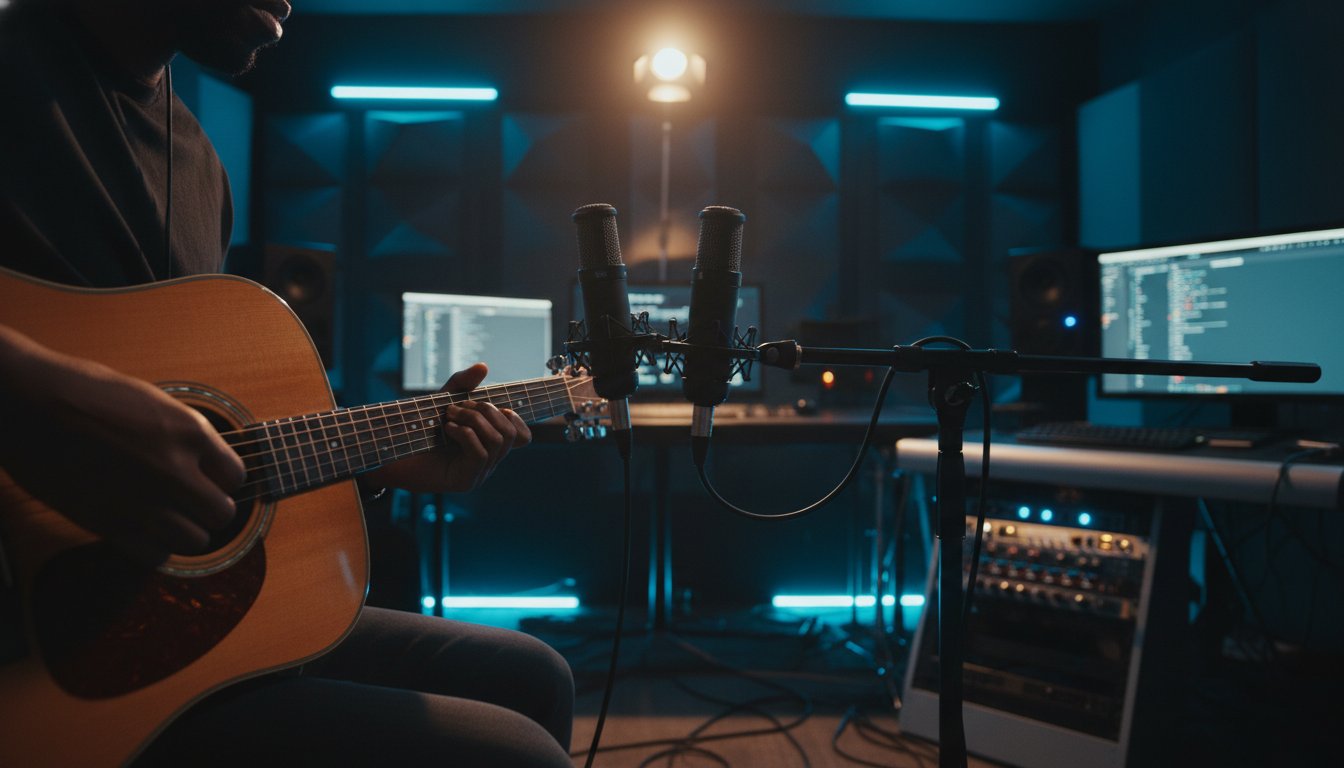
The most expensive microphone in your locker cannot fix a fundamental misunderstanding of how sound radiates from a hollow wooden body. Great tone isn't bought. It's engineered through a precise dance of physics and artistry. Many creators struggle with a boomy low-end masking their melodies. Others fight a thin, tinny sound that feels disconnected from the soul of the performance. If you have ever battled phase issues while perfecting your microphone techniques for acoustic guitar, you know how quickly a creative spark can vanish under technical frustration.
We believe your music deserves a high-fidelity foundation that captures every nuance of your vision. This is your roadmap to transforming a simple recording into a vibrant, radio-ready masterpiece. You will discover the exact placements we use to capture clarity and depth, including why placing a small-diaphragm condenser 6 to 12 inches from the 12th fret is a studio standard. We are going to explore how to balance natural ambience with the direct energy of the strings using X/Y and Mid-Side arrays. This guide provides the technical precision, from 24-bit clarity to phase-perfect positioning, that you need to set up your next session quickly and achieve world-class results.
Key Takeaways
- Learn why the soundhole is often the worst place to aim a mic and how to visualize the guitar body as a radiating speaker cone for better tonal capture.
- Apply the 3:1 Rule to your microphone techniques for acoustic guitar to eliminate phase cancellation and ensure a professional, cohesive stereo image.
- Discover how to choose between immersive stereo width for solo arrangements and focused mono tracks for dense, radio-ready mixes.
- Identify and solve the "floor reflection" problem using acoustic baffles to preserve the clarity and punch of your high-fidelity signal path.
- Understand how professional recording in a dedicated sanctuary like Starsound Studios provides the technical precision and atmosphere needed for world-class results.
The Physics of Performance: Understanding How Your Guitar Radiates Sound
An acoustic guitar is far more than a wooden box with strings. It is a sophisticated, three-dimensional radiation system where every component contributes to a specific part of the frequency spectrum. To capture a world-class recording, you must stop treating the instrument as a single source of sound. Think of the top board as a high-fidelity speaker cone. This thin piece of spruce or mahogany vibrates to project mid-range energy and sustain, while the strings and neck provide the high-frequency "air" and transient detail that define a modern mix. Mastering microphone techniques for acoustic guitar begins with respecting how this physical ecosystem interacts before you ever hit the record button.
The Soundhole Trap
New engineers often point the capsule directly at the soundhole, expecting the most volume and "truth" from the instrument. This is almost always a mistake. The soundhole acts as a low-frequency exhaust port where internal air pressure and resonance converge into a muddy, incoherent mess. When you place a directional microphone too close to this opening, you trigger the proximity effect. This physical phenomenon creates an artificial boost in bass frequencies, usually resulting in a massive buildup between 100Hz and 200Hz. This boominess masks the melody and makes the track nearly impossible to balance during the stereo mixing process. The soundhole is a low-frequency exhaust port that focuses internal air resonance rather than the instrument's full tonal clarity.
Frequency Zones of the Acoustic Guitar
Every square inch of the instrument offers a different sonic texture, and knowing where to look is the secret to a radio-ready track. The neck and strings are your primary source for high-frequency "zing" and transient pick attack. If you want a track that cuts through a dense arrangement, you need that string definition. Conversely, the area behind the bridge captures the "body" and structural woodiness of the instrument. The 12th fret serves as the ultimate pivot point; it is the golden intersection where the resonance of the body meets the clarity of the strings.
Understanding these distinct zones allows you to graduate from basic mono captures to sophisticated Stereo Miking Frameworks that provide immersive depth. The air mass inside the body also plays a critical role. It resonates at a specific frequency determined by the body's volume. A dreadnought has a massive, booming air mass, while a parlor guitar is tight and mid-forward. When you apply professional microphone techniques for acoustic guitar, you are essentially choosing which part of this air-and-wood ecosystem to highlight. By visualizing the sound radiating in three dimensions, you gain the confidence to move the mic with purpose, capturing the spirit of the performance with absolute technical precision.
Standard Placement: Sculpting Tone at the 12th Fret and Bridge
Achieving a radio-ready sound starts with a single, intentional move. The 12th fret is often called the "Golden Rule" of acoustic recording for a reason. It's the point where the neck's clarity meets the body's resonance. When you are refining your microphone techniques for acoustic guitar, this is your baseline. A professional Standard Placement: Sculpting Tone involves more than just pointing a mic; it's about finding the intersection of physics and performance. You're capturing the energy of the strings while allowing the wood to speak.
Angle of incidence is a secret weapon that many home engineers overlook. A small 30-degree shift in the capsule's direction can drastically alter the high-end character of your track. Tilting the microphone toward the headstock emphasizes the "zing" of the strings and brightens a dark-sounding instrument without reaching for an EQ plugin. Conversely, angling it slightly toward the soundhole introduces a controlled warmth. It's a game of millimeters. Move the mic. Listen. Repeat. The goal is to find the sweet spot where the guitar feels balanced and alive before the signal even reaches your DAW.
Distance acts as your primary natural equalizer. Placing a microphone 6 inches from the guitar captures an intimate, detailed sound rich with transient information. However, moving it back to 10 or 12 inches allows the instrument to breathe. This distance manages the balance between the direct sound of the instrument and the natural acoustics of your space. For a truly immersive feel, try the "Over-the-Shoulder" technique. By placing a mic near the player's ear, you capture the perspective of the artist. It's a natural, honest sound that adds a unique sense of realism to solo performances.
The 12th Fret Technique Step-by-Step
Position a small-diaphragm condenser, like a Neumann KM184, approximately 8 to 12 inches from where the neck meets the body. This location minimizes the boomy air from the soundhole while highlighting the pick attack. Ensure you are recording at a 24-bit resolution to preserve the full dynamic range of the performance. If the sound feels too clinical, angle the capsule slightly toward the soundhole to pull in more fundamental energy. You're looking for a perfect marriage between the percussive finger noise and the clarity of the notes.
The Bridge Position for Body and Percussion
When you need more "thump" or a woody, percussive character, move to the bridge. Place your mic 2 to 3 inches behind and slightly above the bridge, aimed at the wood surface. This position is ideal for folk strumming or modern percussive styles where the body of the guitar acts as a rhythm instrument. We often blend this bridge capture with a 12th-fret mic to create a full-range, three-dimensional image. If you want to hear how this precision translates to a professional environment, consider recording your next project in a space designed to maximize these technical nuances.
Stereo Miking Frameworks: Creating Width and Immersive Depth
A single microphone captures a point. Two microphones capture a space. While mono tracks provide a solid foundation for dense pop arrangements, solo performances demand the three-dimensional realism of advanced microphone techniques for acoustic guitar. As we move into the 2026 production era, listeners expect an immersive experience. Whether you are preparing a track for standard stereo mixing or a complex Dolby Atmos 9.1.4 environment, your miking strategy determines the final depth of the soundstage. Stereo miking is essential for solo guitar but risky for dense mixes where a wide image can clutter the center of the arrangement.
Phase is the silent predator of great tone. When two microphones capture the same source at slightly different times, their waveforms can cancel each other out. This results in a thin, hollow sound that lacks impact. To prevent this, professional engineers rely on the 3:1 Rule. If your first microphone is 8 inches from the 12th fret, your second microphone should be at least 24 inches away from the first. This distance ensures that timing differences don't destroy your frequency response. It is about technical discipline. Precision ensures your tracks remain punchy, even when summed to mono.
XY vs. Spaced Pair vs. Mid-Side
Choosing the right configuration is about balancing width with stability. The XY configuration is the safest stereo image. By placing two cardioid capsules at a 90-degree angle, you achieve zero phase issues and a focused sound. Spaced Pair (A/B) offers a huge, wide soundstage. It feels cinematic and expansive, but it carries a high risk of comb filtering if not perfectly aligned. Mid-Side (M/S) remains the ultimate professional choice. By combining a cardioid "Mid" mic with a figure-8 "Side" mic, you can adjust the stereo width in post-production without risking phase degradation.
Phase Alignment: The Invisible Tone Killer
Visualizing your audio is just as important as hearing it. After tracking, open your DAW and zoom into the waveforms. If the peaks of one track align with the troughs of another, you have a phase problem. A quick "polarity flip" on one channel can often restore the lost low-end immediately. In a world where immersive audio adheres to a strict -18 LUFS standard, every millisecond of alignment counts. Ensuring phase coherence isn't just a technical chore. It is how you guarantee your music translates perfectly from high-end studios to smartphone speakers. This level of detail is exactly what we teach in our audio engineering classes to help artists reach their highest potential.

Beyond the Mic: Room Dynamics and Signal Path Excellence
A world-class recording is the sum of its parts. You can master the most complex microphone techniques for acoustic guitar, but if your recording environment is cluttered with unwanted reflections, your tracks will sound small. The room is the final component of your instrument. It breathes with the guitar. Every hard surface, from the hardwood floor to the glass window, acts as a mirror for sound waves. When these reflections arrive at the capsule mere milliseconds after the direct sound, they create the "Floor Reflection" problem. This interference blurs the stereo image and softens the punch of your performance. A simple thick rug or a strategically placed acoustic baffle can be the difference between a demo and a professional release.
Capturing the spirit of a performance requires a signal path that respects the speed of sound. Acoustic guitars are rich in fast transients, the initial "click" of the pick hitting the string. To preserve this energy, your choice of preamp is just as critical as the microphone itself. High-end, transformer-based preamps provide a subtle harmonic saturation that makes a guitar feel "expensive" and finished. This is the science of the medium meeting the art of creation. It's about ensuring every detail of your artistic vision is handled with absolute technical precision. Your gear shouldn't just record; it should enhance.
Taming the Recording Environment
Corners are the enemy of clarity. In home studios, low-end energy tends to gather in the corners, creating a bloated, inaccurate representation of your guitar's tone. To combat this, find the "live" spot in your room, usually away from walls, where the reverb feels natural and pleasing. You don't need a million-dollar renovation to improve your space. Use "human baffles" like heavy acoustic blankets or even open closets filled with clothes to soak up stray reflections. If you want to elevate your sound beyond these temporary fixes, our professional recording sessions offer a dedicated sanctuary where every acoustic detail is already optimized for your success.
The Signal Chain: From Capsule to Converter
While we discussed placement earlier, the specific tool you choose defines the final texture of the track. Small Diaphragm Condensers (SDCs) are the industry standard for a reason. Their small capsules respond faster to those high-frequency transients, delivering the "shimmer" found on radio-ready tracks. If you're looking for a "vintage" or "woody" character, a Ribbon microphone provides a smooth, natural top end that mimics the human ear. Large Diaphragm Condensers (LDCs) are your go-to for adding weight and body. By understanding the signal chain from capsule to converter, you move from guessing to knowing. You gain the confidence to make creative decisions that stick.
Elevating Your Sound: Professional Tracking at Starsound Studios
The journey from a bedroom demo to a radio-ready masterpiece often hits a plateau when the limitations of a home environment become apparent. While mastering DIY microphone techniques for acoustic guitar is a vital skill for any creator, there is a distinct sonic threshold that only a high-end technical facility can cross. Starsound Studios is more than a facility. It's a sanctuary. Here, the science of the medium meets the spirit of creation. Our North Royalton facility isn't just a room with gear. It's an environment where the atmosphere and equipment are intentionally curated to help you reach your highest potential.
Collaborating with Steve 'The Mix' means you aren't just hiring an engineer. You're gaining a seasoned mentor who is just as invested in your project's final pulse as you are. We focus on finding your instrument's unique voice, ensuring that the character of your guitar isn't just captured but celebrated. Whether you're looking for a traditional stereo image or a next-generation immersive experience, our team handles the complex technical details so you can stay focused on the performance. We bridge the gap between the science of audio fidelity and the raw energy of your music. It's a collaborative process built on reliability and world-class standards.
The Professional Advantage in Cleveland
Access to a curated locker of world-class microphones is one of the most significant benefits of a professional session. In our studio, you can experience the legendary warmth of a U47, the airy detail of a C12, or the transient precision of a KM184. These tools, paired with our expertly treated acoustic spaces, allow the natural resonance of your instrument to bloom without the interference of boxy room modes or floor reflections. Professional tracking at Starsound Studios saves you hours of frustration later. You won't have to "fix it in the mix" because the source material is already pristine, balanced, and full of life.
From Tracking to Mastering
Your acoustic tracks are the foundation of your sound, but their potential truly expands during the post-production phase. Our facility features a certified Dolby Atmos 9.1.4 suite, allowing us to place your guitar in a three-dimensional space that standard stereo simply cannot match. From the initial tracking to the final mastering, our steady and intentional rhythm ensures a polished, world-class result. You deserve the peace of mind that comes with knowing every frequency and phase relationship is being managed by experts. When you are ready to transform your vision into a professional reality, Book your session at our North Royalton studio and let's create something extraordinary together.
Your Path to Sonic Excellence
Mastering the technical nuances of your instrument is the first step toward a track that resonates with listeners. You now understand how to move beyond basic setups by respecting the physics of sound radiation and the critical role of phase coherence. By applying these professional microphone techniques for acoustic guitar, you've gained the power to sculpt tone with absolute precision. Whether you are balancing the intimate transients of a fingerstyle piece or the driving energy of a folk anthem, your focus on the signal path and room dynamics will ensure your work stands out in any mix.
We believe your music deserves a sanctuary where technical perfection meets creative fire. Ohio's only certified Dolby Atmos studio is ready to bring your vision to life. Led by Steve 'The Mix' with over 20 years of industry experience, our state-of-the-art 9.1.4 immersive suite provides the sonic advantage your project needs. Ready to capture the perfect take? Book your session at Starsound Studios today. We're just as invested in your masterpiece as you are. It is time to transform your creative potential into a world-class reality.
Frequently Asked Questions
What is the best microphone for recording acoustic guitar on a budget?
A small-diaphragm condenser like the Audio-Technica AT2021 or the Lewitt LCT 040 is an excellent entry point for achieving professional clarity. These microphones excel at capturing the fast transients and high-end shimmer that define a radio-ready sound without requiring a massive financial investment. They provide a focused, detailed capture that is much easier to manage in a home studio than a cheap large-diaphragm alternative.
Should I record acoustic guitar in mono or stereo?
The choice depends entirely on the density of your mix. Use a mono track for guitars that need to sit firmly in a busy arrangement, as this leaves more room for vocals and other instruments. Stereo microphone techniques for acoustic guitar are better suited for solo performances or sparse arrangements where the instrument needs to fill the entire soundstage with immersive depth and realistic width.
How far away should the microphone be from the guitar?
A distance of 6 to 12 inches is the industry standard for capturing a balanced, natural tone. Placing the mic closer than 6 inches often triggers the proximity effect, which artificially boosts the low-end and makes the recording sound muddy. Moving the mic back toward 12 inches allows the instrument to breathe and incorporates more of the room's natural character, provided your space is acoustically treated.
How do I stop my acoustic guitar recordings from sounding boomy?
Avoid pointing the microphone directly at the soundhole, which acts as an exhaust port for low-frequency energy. Instead, aim the capsule at the 12th fret or the bridge to capture more string definition and woodiness. If the boominess persists, slightly increase the distance between the mic and the instrument or use a high-pass filter during tracking to roll off frequencies below 80Hz.
Is it better to use a condenser or a dynamic mic for acoustic guitar?
Condenser microphones are generally preferred because their lighter diaphragms respond more accurately to the high-frequency detail and delicate nuances of acoustic instruments. A small-diaphragm condenser is the studio standard for "shimmer." However, a high-quality dynamic mic like the Shure SM7B can be a fantastic choice if you're recording in a noisy environment or seeking a warmer, more rounded tone with less top-end bite.
What is the 3:1 rule in microphone placement?
The 3:1 rule states that when using two microphones on a single source, the second microphone should be at least three times as far from the first microphone as the first is from the guitar. If your primary mic is 8 inches from the 12th fret, your second mic should be at least 24 inches away from that first capsule. Following this principle significantly reduces the risk of phase cancellation and hollow-sounding tracks.
Can I record a great acoustic guitar sound in an untreated room?
You can achieve a usable sound by using close-miking techniques to minimize the room's influence. Position the microphone 6 inches from the 12th fret and use "human baffles" like heavy blankets or a closet full of clothes to absorb stray reflections. While these DIY fixes help, a professionally treated sanctuary like our North Royalton studio provides a level of sonic precision that home setups simply cannot replicate.
How do I check for phase issues when using two microphones?
The most reliable method is to engage the polarity flip button on one of your preamp channels while listening in mono. If the sound becomes thin and loses its low-end when the polarity is flipped, your mics are in phase; if the sound gets fuller, they were out of phase. You should also zoom into your DAW's waveforms to ensure the peaks and troughs of both tracks align perfectly.


