
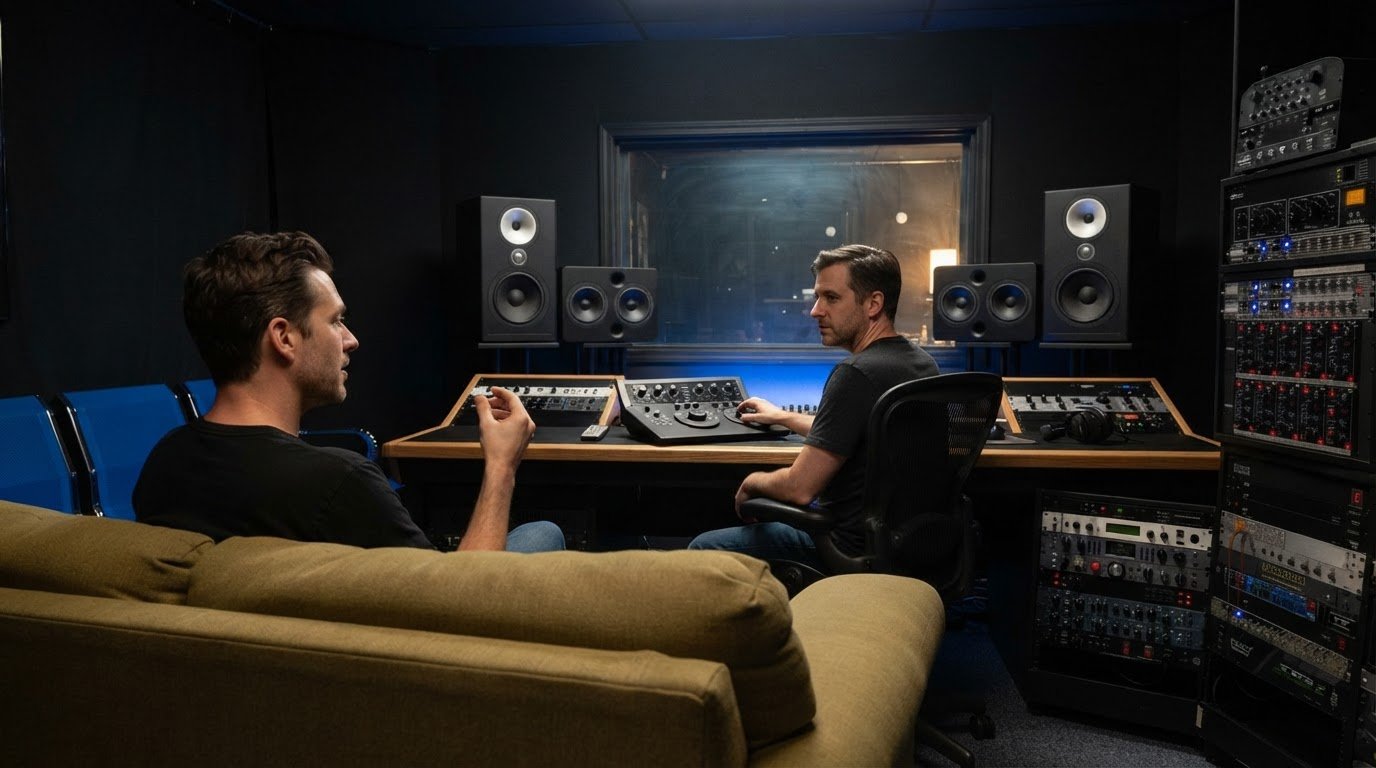
Clear feedback turns a mastering revision from a vague request into a focused adjustment. Understanding the mastering revisions process means listening to the delivered master, identifying what feels off, then sending specific notes about the sound and moment you want the engineer to revisit. You don’t need to prescribe every technical move; describe what you hear and what you want to feel instead.
It’s natural to have an immediate reaction, especially when a song you know by heart sounds newly polished. A little distance can help you distinguish a lasting concern from the surprise of hearing the master for the first time. Thoughtful notes make the exchange clearer and keep attention on the music.
This guide explains what mastering revisions involve and how to shape useful feedback with listening breaks, reference tracks, timestamps, and concrete examples. You’ll learn how to describe a change clearly, so the engineer can understand your creative intent and bring the master closer to the sound you’re after.
Key Takeaways
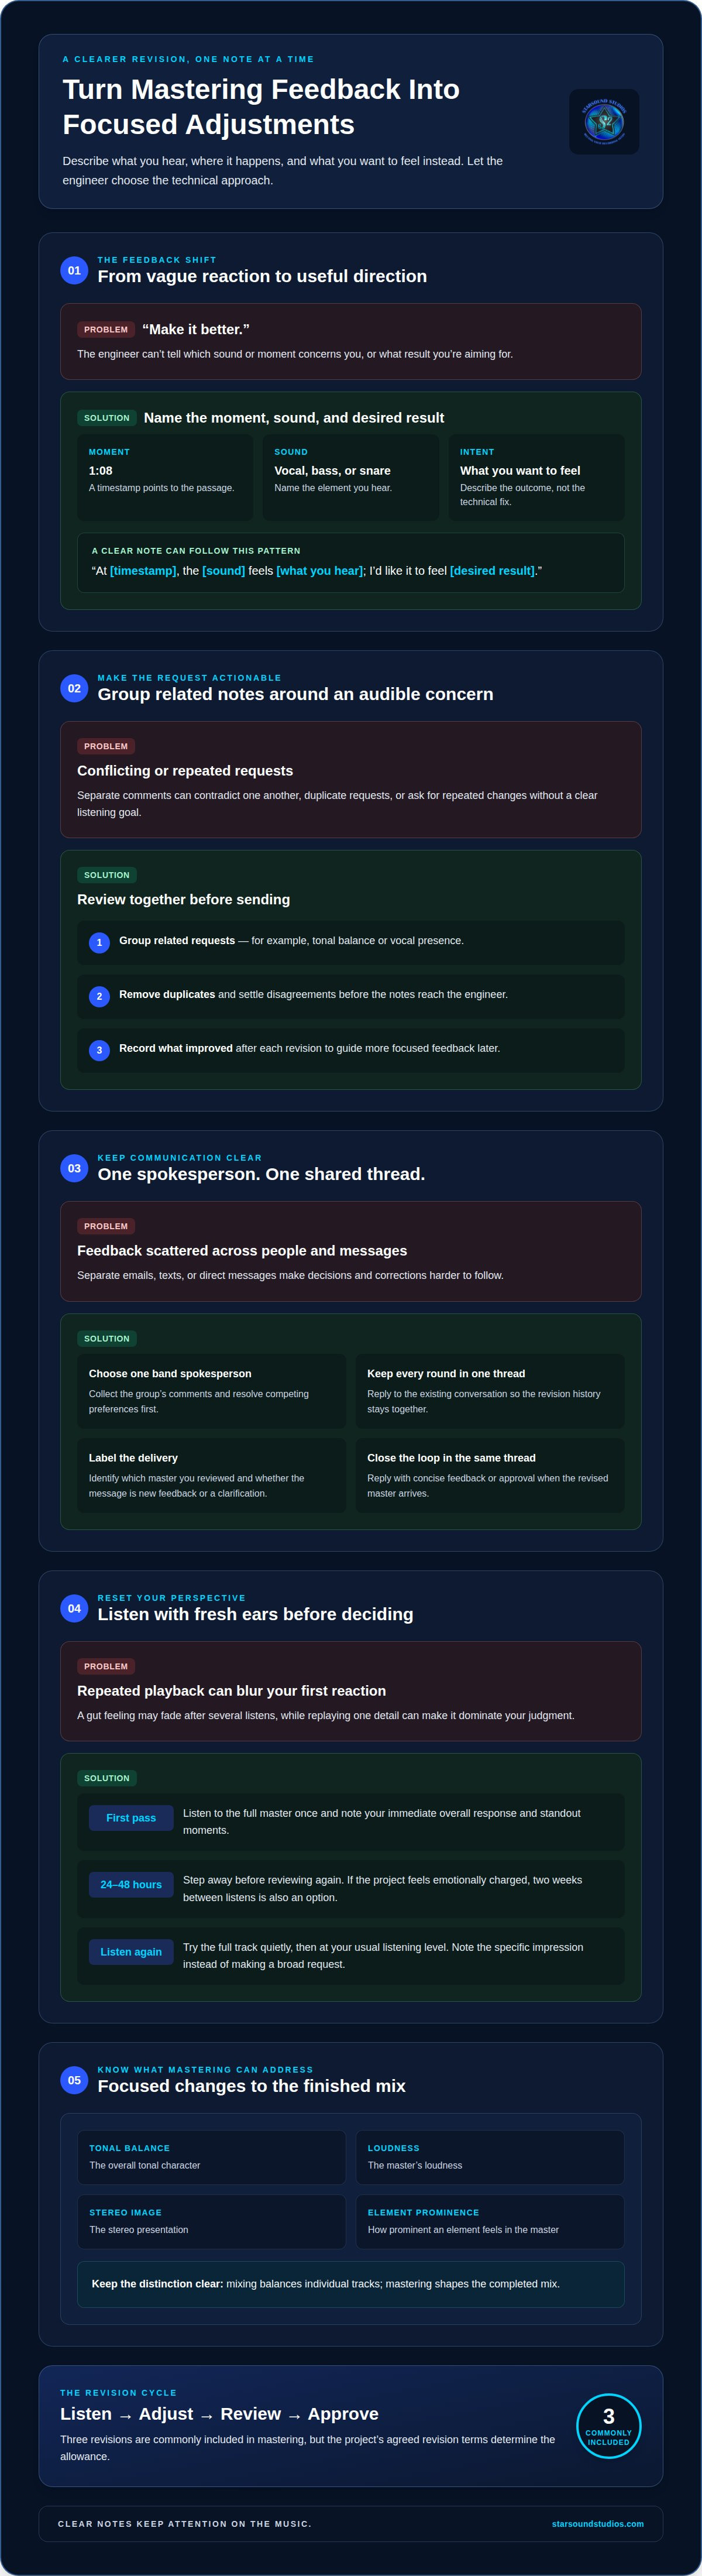
- Make revision notes specific: identify the moment in the track and describe what you hear and want changed.
- Choose one band member to gather feedback and send it to the engineer in a single communication thread.
- Take listening breaks before deciding what needs adjustment; fresh ears can help distinguish lasting concerns from first impressions.
- Use reference tracks and clear examples to communicate the sound you’re aiming for without prescribing every technical move.
What is Mastering Revisions?
Mastering revisions are focused changes to a finished mix after you review the master. Understanding the mastering revisions process helps you explain what you hear and what you want adjusted, without needing to prescribe the engineer’s technical approach.
Structure Feedback with Specific Elements and Time Markers
Identify the sound, the moment, and the desired result. A timestamp such as 1:08 can direct attention to a specific passage; naming the vocal, bass, or snare clarifies the concern. One band spokesperson can combine the group’s agreed notes. Understanding the mastering revisions process also means recognizing when the issue belongs earlier: mixing balances individual tracks, while mastering shapes the completed mix.
- Online mastering describes a remote way to exchange audio and feedback; a professional mastering engineer evaluates and refines the sound, whether collaboration happens online or in person.
- The steps are to listen to the finished mix, make mastering adjustments, review the master, and approve the final version.
- Three revisions are commonly included in mastering, though the project’s agreed revision terms determine the allowance.
Review Feedback and Plan Revisions
Before sending comments, review them together and group related requests, such as tonal balance or vocal presence. Make sure each note identifies an audible concern and the result you want, without conflicting instructions. Keep a record of what improved after each revision; those observations can help you give more focused feedback on future projects.
- Revisions can address tonal balance, loudness, stereo image, or an element’s prominence in the master.
- Mastering and revision timing depends on the listening, adjustment, and feedback cycle, including how quickly the notes are consolidated.
- Avoid vague requests like “make it better,” conflicting band comments, or repeated changes without a clear listening goal. Clear intentions make it easier to keep the song’s identity at the center.
Specific notes help the engineer understand the requested outcome and can make the revision process more efficient. Before the designated contact relays feedback, the band should agree on each request.
Group mix-change comments by instrument and add a timestamp to each remark. A clear list of requested adjustments gives the client and audio engineer a shared reference and can help prevent revision abuse, keeping communication organized around agreed changes.
Keeping revision communication in one thread
Choose one member to coordinate the band’s feedback and send it to the mastering engineer in one thread. This creates a shared record, so decisions and corrections don’t get lost across separate messages.
- Agree on the spokesperson. Select one band member to collect comments before anything goes to the engineer. Ask the other members to send their thoughts to that person, not directly to the engineer. This keeps the conversation focused and gives the group a chance to resolve conflicting preferences first.
- Keep every round in one thread. Reply to the existing conversation rather than starting a new email or message for each thought. The engineer can follow how the request changes, while the band can refer back to decisions already made. Avoid splitting feedback between texts, email, and separate direct messages.
- Label each delivery clearly. State which master you’ve reviewed and whether your message contains new feedback or a clarification. For example, write “notes on the latest master” before the requests. This simple distinction helps prevent an earlier comment from being mistaken for a new instruction.
- Send one consolidated message. The spokesperson should gather the band’s agreed requests, remove duplicates, and flag any unresolved disagreement. If one member wants a brighter vocal while another prefers the current tone, settle on the shared creative goal before sending instructions. Don’t ask the engineer to reconcile competing messages.
- Use the thread to close the loop. After the revised master arrives, reply with concise feedback or approval in that same conversation. If a request still needs attention, explain what remains different from the intended result. Keeping the exchange together makes the revision history easier to follow.
For a remote project, a single-thread habit also keeps communication aligned with the audio being reviewed. Explore remote mastering as an option when you want to collaborate with an engineer without working in the same room.
Taking listening breaks to refresh perspective
Repeated playback can blur your first reaction: a gut feeling may fade after several listens. Take deliberate breaks, then return to the master with fresh ears and more useful feedback.
- Listen once without editing your notes. Play the master from beginning to end, then write down your immediate response. Capture the overall feel and any moments that stand out, rather than replaying one detail until it dominates your judgment. A first-pass note can preserve what the song felt like before close analysis.
- Step away for 24 to 48 hours. A listening break gives your ears and attention a chance to reset. If you need a shorter interval, leave at least 24 hours before reviewing the master again. For a project that feels emotionally charged, taking two weeks between listens is also an option.
- Return at a different volume. Play the full track quietly, then at your usual listening level. Low-volume playback can reveal whether the lead vocal remains clear or sits too far forward against the snare. Write down the exact impression, rather than turning a subtle shift into a broad request to change the whole master.
- Change the listening environment. Compare the master on speakers, earbuds, a phone, laptop, and in a car. Notice whether the same issue appears across these systems or only in one setting. A concern that follows the track across different playback environments is more useful to report than a problem tied to one device.
- Stop when attention drops. Ears tire quickly, so avoid long replay sessions that turn small differences into distractions. If you’re listening in a studio, take a break before returning to the same passage. Send feedback only after a fresh, full-track listen confirms the concern.
Treat a break as part of the listening process, not as lost time: ears tire quickly, and continued replay can make small details feel more important than they are. Your initial gut feeling may fade after the 4th or 5th listen, so preserve that first response and give it room to settle before deciding whether a concern still matters.
If you need more distance, leave 2 weeks between listens. Returning after a longer pause can help you check whether your original reaction still holds, rather than relying on an impression shaped by repeated playback.
Using reference tracks and examples
Before sending a mix to a mastering engineer, prepare the final mix, reference tracks, and concise notes about your intended sound. Choose references that match your creative direction, then describe what you hear rather than asking the engineer to copy another recording.
- Choose references with a clear purpose. Pick a track that helps communicate a specific quality, such as vocal presence, low-end balance, or overall brightness. Listen to the reference before your mix, too, so you understand how it sounds in your playback environment. A useful comparison clarifies the direction, not just the genre.
- Compare like with like. Play the reference and your mix at a similar perceived volume. Otherwise, the louder track can seem more exciting even when loudness isn’t the quality you want. Note the difference you hear, such as a vocal that feels less forward or a kick that lacks definition.
- Describe the sound in plain language. Pair each reference with a concrete observation. For example, “The kick and bass feel crowded between 0:45 and 1:10; could the kick feel more defined?” This gives the engineer a passage and a listening goal without demanding a specific processing method.
- Keep suggestions tied to the result. If your master feels quieter than the reference, say that you want the perceived level closer. A note might suggest raising the final master by about 1 dB RMS, but describe the reference and desired match too. For bass, you might identify excess energy around 200 Hz while asking to keep the sub below 50 Hz clean.
- Send the essentials together. Include the reference track, the relevant passage, and one clear request for each concern. Avoid stacking unrelated changes into a single note. That makes the creative target easier to interpret and keeps the revision focused.
Ready to shape your finished mix with an engineer? Explore mastering with Starsound Studios.
Starsound Studios: Stereo Mixing
Starsound Studios offers Stereo Mixing and Mastering for artists shaping a track from individual elements through to its final polish. If revision feedback reveals that a concern starts in the balance of the mix, addressing that stage can help clarify the sound before mastering. For a more immersive presentation, the studio also offers Dolby Atmos Mixing (9.1.4).
Bring your creative direction, reference tracks, and consolidated notes into the process. Clear communication gives the engineer useful context about the result you’re pursuing, whether you’re preparing a mix for mastering or refining a stereo production. Starsound Studios offers Audio Recording in Cleveland, Ohio, for projects that need a dedicated space to capture a performance.
To discuss your project and the right next step, contact Starsound Studios.
Carry Your Creative Direction Into the Next Session
A clearer understanding of the mastering revisions process can shape more than one final pass. Treat each revision as a chance to define what makes your track feel unmistakably yours, then carry that language into future recording and production decisions. The goal isn’t to make your sound identical to a reference. It’s to make choices that serve the song’s identity.
As you prepare your next project, keep a short record of the feedback that helped most. Which descriptions made your intent clear? Which comparisons revealed a useful direction? Those observations can become part of your creative toolkit, helping you collaborate with greater confidence and keep the music at the center of each technical decision.
If you’re ready to shape the next stage of your project, contact Starsound Studios. Bring your vision and keep moving toward a sound that feels fully your own.
Frequently Asked Questions
How does the mastering revision process work?
The process begins when you listen to the master and send the engineer a clear, agreed request. The engineer revisits the relevant part of the sound, then provides an updated version for review. For example, you might ask for more vocal brightness while keeping sibilance controlled. Listen to the change in the full song, not only the targeted moment, before deciding whether it serves the track.
How long does mastering and revisions usually take?
Timing depends on the listening, adjustment, and feedback cycle, including how quickly feedback is consolidated. Keep the project from dragging on for weeks.


