

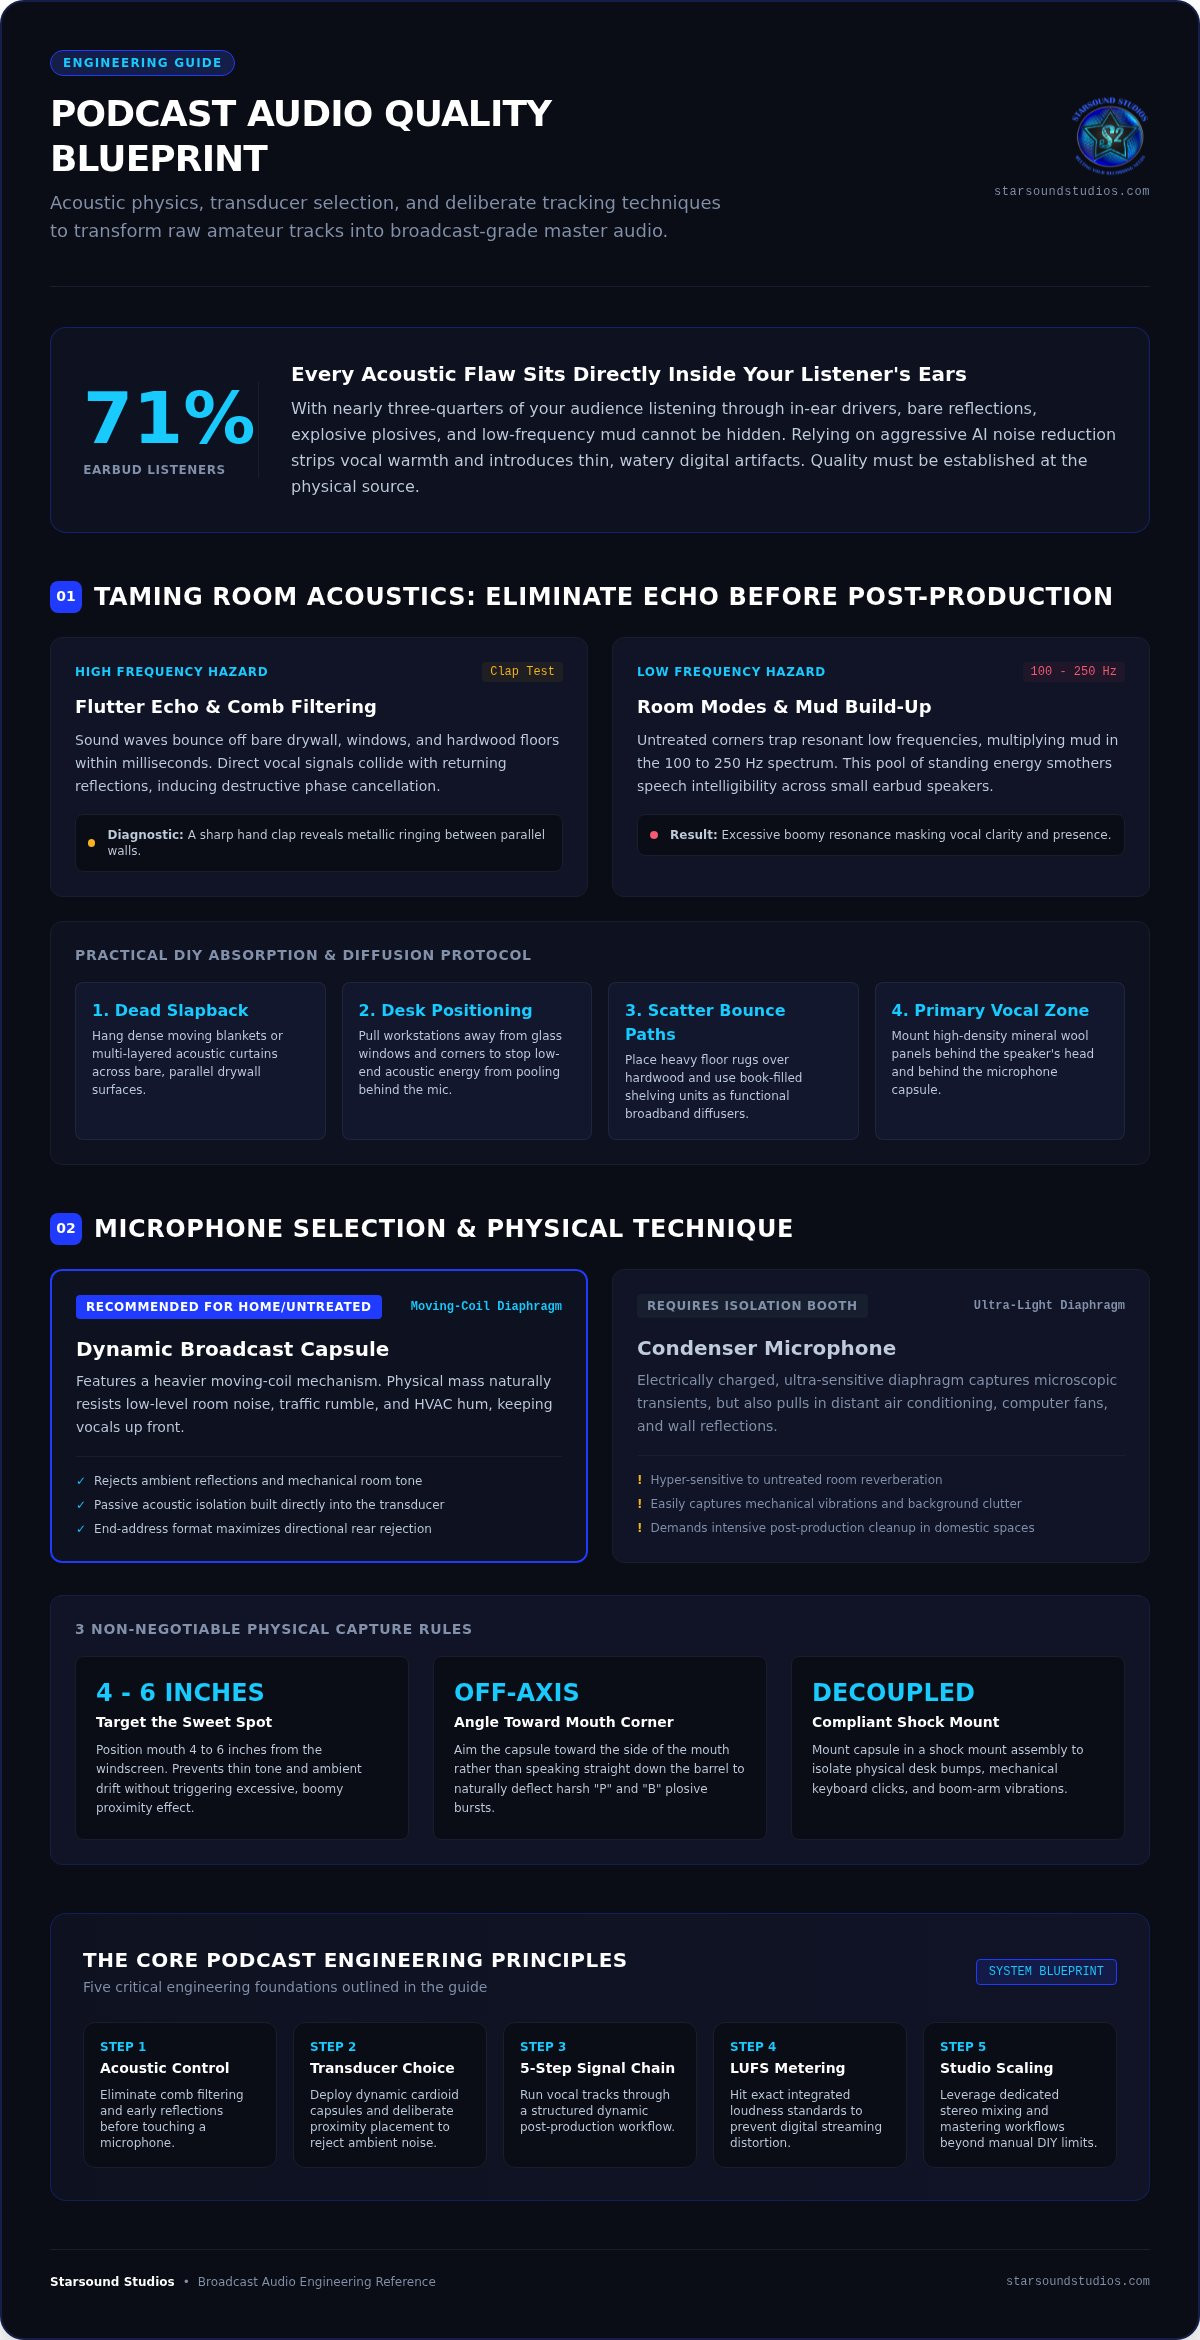
With 71% of podcast listeners tuning in through earbuds, every acoustic flaw in your episode sits directly inside your audience's ears. If you find yourself asking, "How do I genuinely improve my podcast audio quality?", cranking up aggressive AI noise reduction is not the answer. Those automated tools often strip away your vocal warmth, leaving behind thin, hollow reflections and distracting watery artifacts. You pour hours into crafting compelling conversations; the physical sound of your voice should command the exact same level of respect.
You already know the frustration of battling room echo, taming explosive plosives, and struggling to balance wild volume jumps between co-hosts. This comprehensive engineering guide gives you the exact blueprint to transform raw, amateur tracks into broadcast-grade master audio. You will discover how to eliminate ambient distractions at the physical source, master professional gain staging, and implement intentional dynamic processing that makes your voice cut through any mix with authority.
Key Takeaways
- Control acoustic reflections and eliminate comb filtering in your room before you ever touch a microphone capsule.
- Select dynamic cardioid capsules and master deliberate proximity techniques to reject mechanical ambient noise.
- Build a disciplined five-step vocal signal chain to reliably improve my podcast audio quality across every recording session.
- Hit precise platform loudness targets with integrated LUFS metering to prevent aggressive digital streaming distortion.
- Know when to scale beyond manual DIY fixes by leveraging external studio stereo mixing and mastering workflows.
Taming Room Acoustics: Eliminate Echo Before Touching a Microphone
A pristine vocal recording starts in the physical room, not in your digital audio workstation. Hard surfaces like bare drywall, untreated glass windows, and hardwood floors bounce your voice back toward the microphone capsule milliseconds after you speak. These direct reflections collide with the incoming vocal signal, triggering comb filtering that introduces phase cancellations. When you search for genuine ways to improve my podcast audio quality, you must solve physical space issues before attempting to fix them in post-production. Many creators lean on automated AI de-reverb plugins to scrub out hollow room reflections. Unfortunately, heavy digital processing strips transient clarity and replaces early reflections with watery, robotic artifacts that fatigue listeners.
Identifying Flutter Echo and Room Modes in Home Spaces
You can identify severe room reflections in seconds. Stand in your intended recording space and clap your hands sharply once. A metallic, high-frequency ringing sound reveals harsh flutter echo bouncing between parallel walls. Corners present the opposite problem by trapping resonant low frequencies. These localized room modes amplify muddy bass build-up around 100 to 250 Hz, severely clouding speech intelligibility. True sound isolation requires dense, decoupled architectural construction to keep exterior street noise out, but controlling internal room reflections requires acoustic absorption inside the space.
Practical DIY Acoustic Treatment Strategies on a Budget
You don't need a custom-built vocal booth to establish controlled acoustics. Strategic placement of everyday household items can drastically reduce early reflections around your recording desk:
- Eliminate slapback: Hang dense moving blankets or multi-layered acoustic curtains across bare, parallel drywall to deaden flutter echo.
- Optimize desk positioning: Pull your recording setup away from reflective glass windows and corners to stop low-end acoustic energy from pooling directly behind your microphone.
- Scatter harsh bounce paths: Use heavy floor rugs on hardwood, alongside book-lined shelving units, to serve as effective broadband diffusers.
- Target the primary vocal zone: Mount high-density mineral wool panels behind your head and behind the microphone to absorb direct vocal reflections before they spread.
Taming physical reflections preserves natural vocal timbre. When you capture a dry, uncorrupted signal at the source, you establish the foundation needed to truly improve my podcast audio quality without relying on destructive software filters.
Microphone Selection and Proper Technique for Podcasting
No software algorithm can reconstruct acoustic details lost at the microphone diaphragm. While marketing campaigns often suggest built-in laptop microphones sound pristine through automated filters, real physics tells a different story. Transducer design dictates how cleanly your voice separates from ambient room noise. Understanding this interaction is the fastest way to improve my podcast audio quality, because capturing a robust analog signal eliminates hours of tedious cleanup down the line.
Dynamic vs. Condenser Microphones for Untreated Rooms
Capsule architecture changes everything. Condenser microphones utilize lightweight, electrically charged diaphragms that capture ultra-fast transient detail, yet this hyper-sensitivity also picks up air conditioning hum and distant traffic. In contrast, dynamic broadcast microphones rely on heavier moving-coil mechanisms. This physical mass naturally rejects low-level ambient distractions. For non-isolated home studios, an end-address dynamic microphone offers the passive isolation needed to keep spoken vocals up front and background clutter in the shadows.
Managing the Proximity Effect and Off-Axis Rejection
Proper microphone technique requires deliberate physical positioning. Move too far from the capsule, and your voice thins out while ambient room tone creeps in. Get too close, and the proximity effect creates boomy, boisterous low-end frequencies that overwhelm small earbud drivers. Keep these mechanics in mind:
- Target the sweet spot: Keep your mouth between four and six inches from the windscreen to secure rich vocal presence without triggering severe boominess.
- Angle off-axis: Point the microphone capsule toward the corner of your mouth rather than speaking directly down the barrel, effectively deflecting destructive "p" and "b" plosives away from the diaphragm.
- Decouple the hardware: Mount your capsule inside a compliant shock mount on an adjustable boom arm to isolate the pickup pattern from desk bumps and keyboard clicks.
Proper Audio Interface Gain Staging Rules
Clean amplification sets up everything downstream. When calibrating your hardware interface preamps, speak at your natural hosting energy and adjust input gain until your digital meters comfortably bounce between -18 and -12 dBFS. This calibration leaves approximately 10 to 12 dB of essential headroom. Unexpected laughter or enthusiastic outbursts won't push your convertor past 0 dBFS into harsh digital clipping. If you want to dial in flawless signal flow before hitting record, exploring structured audio engineering classes can fast-track your command over real-world studio hardware and preamp behavior.
Once you nail hardware gain structure, your raw takes gain dramatic weight and clarity. Consistent mic habits make it simple to improve my podcast audio quality before your files ever touch a single compressor.
The 5-Step Podcast Vocal Post-Production Workflow
Automated one-click processors promise instant polish, yet they routinely introduce watery artifacts and hollow out human speech. A disciplined, sequential signal chain remains the true secret to improve my podcast audio quality with repeatable consistency. Raw takes require surgical dynamic cleanup before any creative sweetening takes place. By executing precise edits and shaping frequencies in logical order, you sculpt natural vocal warmth while maintaining total control over your dynamic range.
Corrective High-Pass Filtering and Subtractive EQ
Clean your vocal fundamentals before triggering downstream dynamics. Engage a high-pass filter with an 18 dB per octave slope at 80 Hz to purge low-end air conditioner rumble and floor vibrations. Next, hunt down problematic build-ups. Sweep a narrow parametric EQ bell filter through the midrange to cut boxy, hollow resonances between 400 and 800 Hz by 2 to 4 dB. Finally, apply subtle, targeted notch cuts between 2 kHz and 4 kHz to tame abrasive plastic microphone resonances, immediately restoring an effortless spoken balance.
Transparent Dialogue Compression and Level Taming
Spoken dialogue demands smooth dynamic discipline rather than heavy pumping. Insert a transparent optical or VCA compressor to gently rein in expressive peaks:
- Ratios: Set a moderate 3:1 to 4:1 ratio to maintain transparent vocal dynamics.
- Gain Reduction: Target 3 to 6 dB of smooth attenuation during louder passages rather than squashing normal speech.
- Attack and Release: Use a medium attack near 20 milliseconds to let natural consonant transients punch through, paired with a smooth 100-millisecond release to avoid audible gain pumping.
De-Essing and Precision Noise Gate Configuration
Harsh sibilance spikes distract listeners instantly. Place a dedicated, frequency-dependent de-esser immediately after your compressor, calibrating the detection circuit between 5 kHz and 8 kHz to clamp down solely on piercing "s" and "t" sounds. Finish your insert chain with a gentle downward expander rather than a harsh, brickwall gate. Setting an expander floor to attenuate quiet pauses by only 8 to 12 dB preserves natural room breath without the jarring stutter of a sudden hard shutoff. Learning how a seasoned sound engineer sequences corrective tools guarantees your tracks achieve industry Loudness standards without degrading vocal warmth. This disciplined, transparent signal flow provides the blueprint needed to steadily improve my podcast audio quality across every single episode you publish.
Loudness Standards, LUFS Metering, and Final Master Exporting
A flawless mix collapses if your final export clashes with streaming distribution systems. Streaming platforms measure integrated perceptual loudness across the entire episode rather than simple digital peak samples. If your render runs too quiet, listeners reach for their volume knobs, pulling up the analog noise floor of their playback devices. If it lands too hot, host platform normalizers clamp down with aggressive automated limiting that blunts speech clarity. Calibrating your gain structure to standard broadcast benchmarks is essential to improve my podcast audio quality for the long haul.
Targeting -16 LUFS for Stereo and -19 LUFS for Mono
Perceived loudness relies on Loudness Units Full Scale (LUFS), calculated via ITU-R BS.1770 algorithms. For two-channel stereo releases containing spoken dialogue alongside stereo intro music, aim for an integrated reading of -16 LUFS across the full timeline. This aligns with Apple Podcasts' target of roughly -16 dB LKFS. Mono spoken-word feeds should be calibrated to -19 LUFS to achieve identical perceived loudness when played across standard consumer outputs. Always use a dedicated loudness meter across your master output bus to monitor both short-term dialogue swings and full-program integrated values before committing to final renders.
Configuring True Peak Limiters and Codec Headroom
Digital conversion introduces hidden distortion. When raw WAV assets convert into distribution codecs like MP3 or AAC, the reconstruction filters create inter-sample peaks that frequently exceed instantaneous digital zero. To protect your program material, implement these master output settings:
- Ceiling limit: Set your final brickwall limiter ceiling to -1.0 dBTP (decibels True Peak) to provide adequate safety headroom.
- Codec buffer: The extra decibel of clearance prevents lossy compression algorithms from introducing crackling inter-sample distortion during platform distribution.
- File format selection: Export uncompressed 24-bit/48kHz WAV files for your production archive, while delivering high-bitrate MP3 files to your hosting provider for maximum platform compatibility.
Delivering polished, commercial-level dynamics across earbuds, vehicle sound systems, and laptop speakers demands technical precision. If you want to bypass platform clipping and guarantee broadcast translation across every directory, review comprehensive mastering practices or partner with an experienced team through remote mastering services to secure pristine loudness compliance. Maintaining strict meter discipline protects dynamic punch and ensures you reliably improve my podcast audio quality from start to finish.
Scaling Production: Transition to Pro Studio Engineering
Every creator reaches a crossroads where manual post-production collides with creative ambition. Spending hours hunting down mouth clicks or nudging phase-misaligned multi-tracks drains the energy you need for compelling guest interviews. While learning foundational acoustic principles helps significantly, DIY troubleshooting has a definite ceiling. When your show expands into multi-host roundtable formats or branded enterprise content, turning to commercial production facilities is the most decisive move to improve my podcast audio quality without losing your schedule to the editing bay.
Evaluating the Hidden Time Costs of DIY Audio Troubleshooting
Quantify your creative investment honestly. If you spend five hours repairing a one-hour recording, your content pipeline stalls. Complex multi-mic interviews introduce bleed between physical capsules, causing comb filtering whenever two hosts talk at once. Consumer desktop cleanup plugins quickly reach a point of diminishing returns here. Pushing noise-removal algorithms to fix multi-mic phase smear destroys the natural depth of your voice. For commercial podcasts representing corporate sponsors or high-profile brands, harsh digital compromises damage authority and alienate discerning listeners.
Partnering with World-Class Audio Specialists
World-class acoustic recording environments bypass technical bottlenecks entirely. In an isolated, purpose-built live room, sound behaves. Reflections vanish at the boundary, preamps run wide open without noise floors creeping in, and multi-track bleed becomes non-existent. Ambition deserves precision. You don't have to navigate these complex engineering hurdles in isolation.
Partnering with seasoned professionals through dedicated mixing and mastering services frees you to focus entirely on conversation and narrative direction. At Starsound Studios, our team brings decades of combined engineering expertise led by Steve The Mix inside a world-class facility, providing pristine recording environments alongside Ohio's first certified Dolby Atmos facility. Whether working in-person in North Royalton or sending multi-track sessions from across the globe for stereo mixing, professional engineers balance disparate guest vocal dynamics, align complex phases, and deliver broadcast-grade power that sets your show apart. Delegating post-production to elite technicians is the definitive step to improve my podcast audio quality, guaranteeing your voice commands the prestige and presence it truly deserves.
Claim Your Signature Broadcast Sound
Broadcast authority is built intentionally from the ground up. You now hold the core engineering blueprint to tame physical room reflections, dial in optimal analog gain staging, execute surgical dynamic equalization, and hit exacting streaming loudness targets. These fundamental practices represent the definitive way to systematically improve my podcast audio quality, freeing your episodes from distracting room echo and harsh digital processing artifacts.
Your ideas deserve pristine acoustic delivery. When your production expands beyond basic home setups, partnering with seasoned audio technicians elevates your show from an amateur hobby to an unshakeable commercial presence. Operating Ohio's first and only certified Dolby Atmos facility, the team at Starsound Studios combines acoustically certified recording rooms with decades of engineering leadership under Steve The Mix. Take your vocal clarity to the highest industry tier: elevate your production with professional engineering at Starsound Studios. Step into the studio or send your remote multi-tracks today, and let your authentic voice command the attention it deserves.
Frequently Asked Questions
Why does my podcast voice recording sound hollow or like I am in a bathroom?
Hollow, distant vocal tone is caused by early room reflections colliding with your direct voice signal. When speaking near untreated drywall, hard floors, or bare glass, sound waves bounce back into the capsule milliseconds later. This time delay causes severe comb filtering, which cancels out vital midrange clarity. Treating direct reflection points with dense absorption panels eliminates this boxy acoustic echo at the source.
Can software plugins completely fix audio recorded in an untreated room?
No software algorithm can fully restore fidelity once acoustic reflections corrupt a raw recording. Automated de-reverb plugins analyze dynamic decay, but pushing them hard removes crucial vocal harmonics along with the room tone. The result is an unnatural, phasey, watery voice that sounds artificial. Physical acoustic management remains mandatory if you want to authentically improve my podcast audio quality without relying on destructive digital filtering.
What is the ideal distance I should maintain from my podcast microphone?
Maintain a consistent distance between four and six inches from the microphone grille. Staying within this window harnesses the capsule's proximity effect, granting spoken dialogue rich low-end authority without sounding muddy or boomy. Moving closer risks heavy breath pops and distortion, while backing beyond eight inches pulls in room echo and forces preamps to work harder, significantly raising your background noise floor.
What loudness level in LUFS should I target for Spotify and Apple Podcasts?
Target an integrated loudness of -16 LUFS for dual-channel stereo spoken word and -19 LUFS for mono deliveries. Both Spotify and Apple Podcasts use automated loudness normalization to match playback volumes across different shows. Setting your master limiter ceiling to -1.0 dB True Peak prevents clipping distortion during platform codec conversion while ensuring your final episode matches major commercial broadcasts without suffering harsh platform attenuation.
Is a dynamic microphone better than a condenser microphone for home podcasting?
Dynamic microphones are significantly better suited for untreated home environments than sensitive condenser models. A dynamic capsule features a heavier diaphragm assembly that requires substantial sound pressure to move, naturally rejecting distant computer fans and ambient street clutter. Condenser mics capture delicate, extended high-frequency nuances, but in a non-isolated room, that sensitivity captures flutter echo, HVAC rumble, and computer clicks that complicate post-production.
How do I stop popping plosive sounds from ruining my vocal takes?
Stop plosives by angling your microphone capsule 30 to 45 degrees off-axis toward the corner of your mouth. Plosive bursts happen when sudden blasts of turbulent air from "p" and "b" consonants strike the microphone diaphragm directly. Combining an off-axis angle with a multi-layered nylon or metal mesh pop filter redirects fast air currents past the capsule while still capturing full vocal frequency richness.
What is the difference between audio mixing and audio mastering for podcasts?
Audio mixing balances individual raw tracks, correcting dynamic levels, equalization, and noise between separate co-host microphones and sound effects. Mastering is the final phase that polishes the blended stereo file for commercial release. During mastering, an engineer applies broad tonal balance, true-peak limiting, and precise LUFS calibration. For Cleveland creators seeking broadcast authority, partnering with professional facilities ensures multi-track sessions translate seamlessly across every consumer earbud and car speaker.


